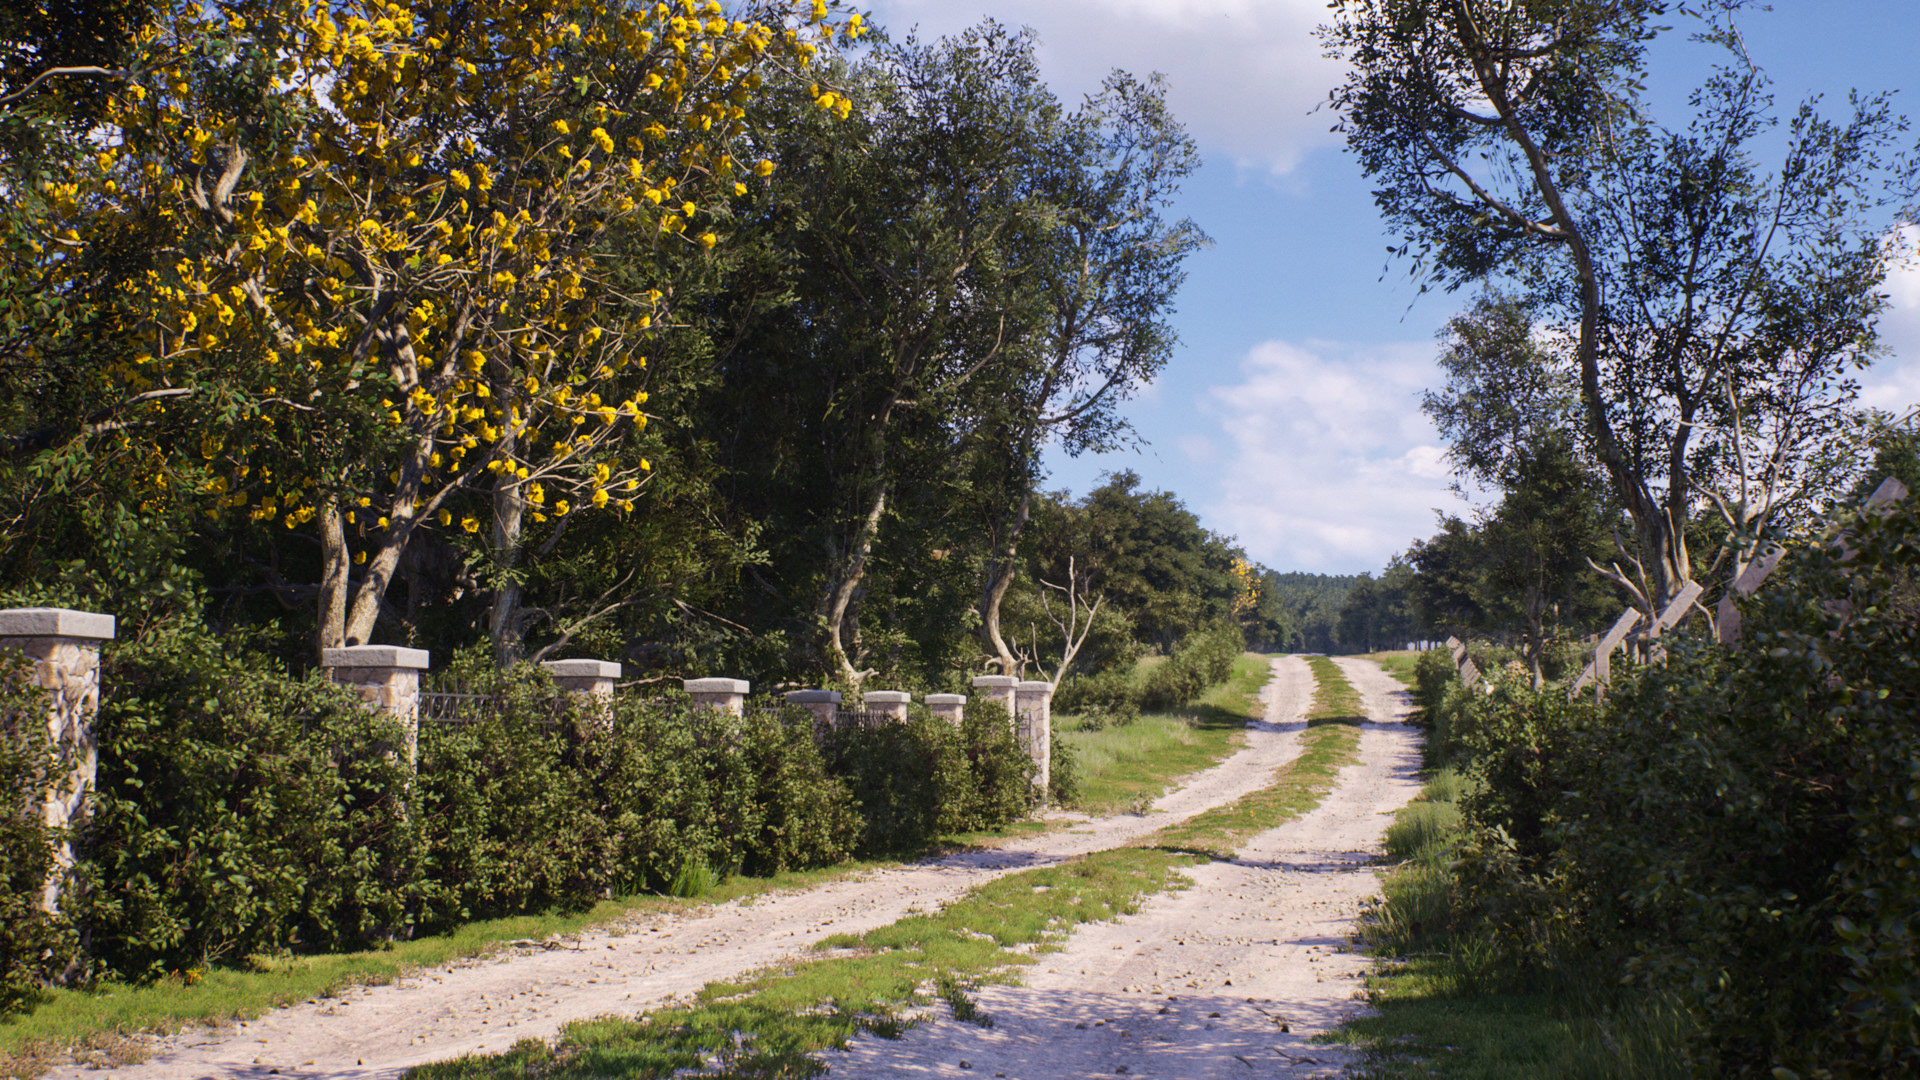
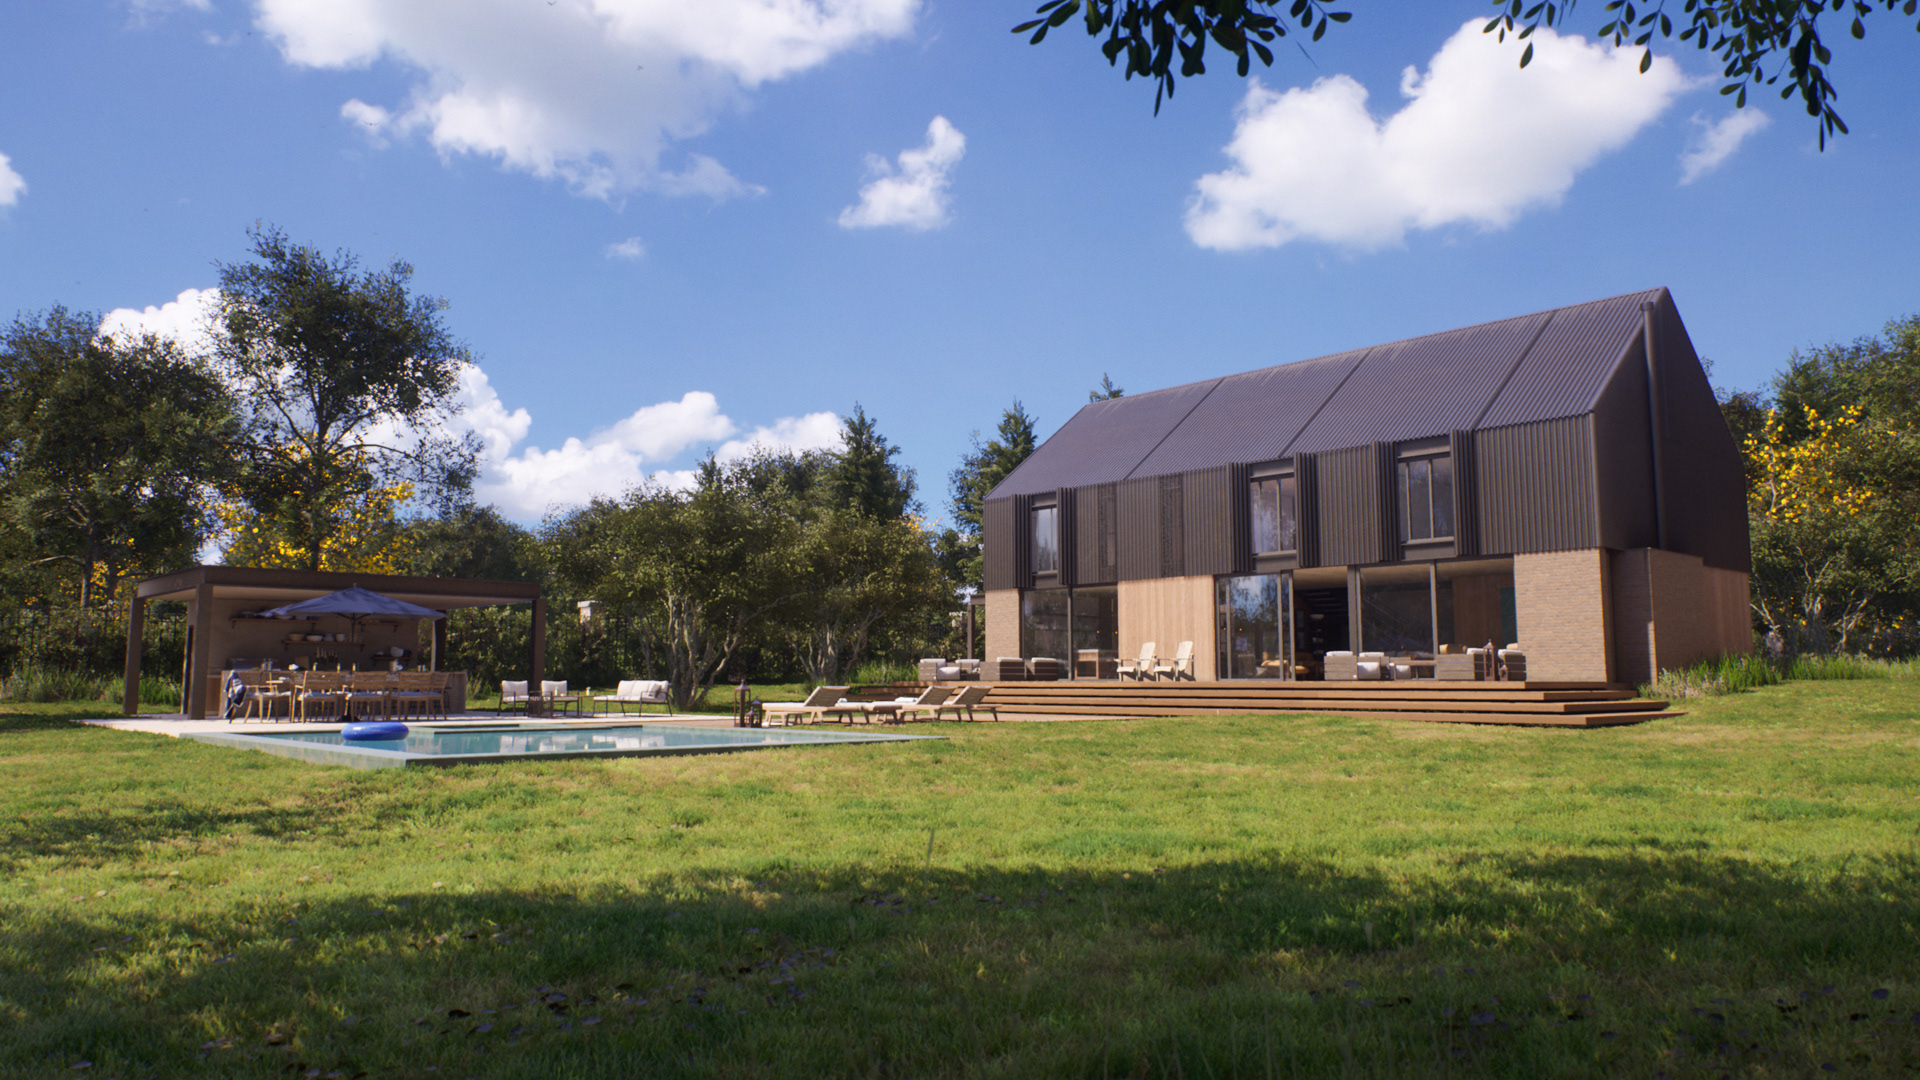
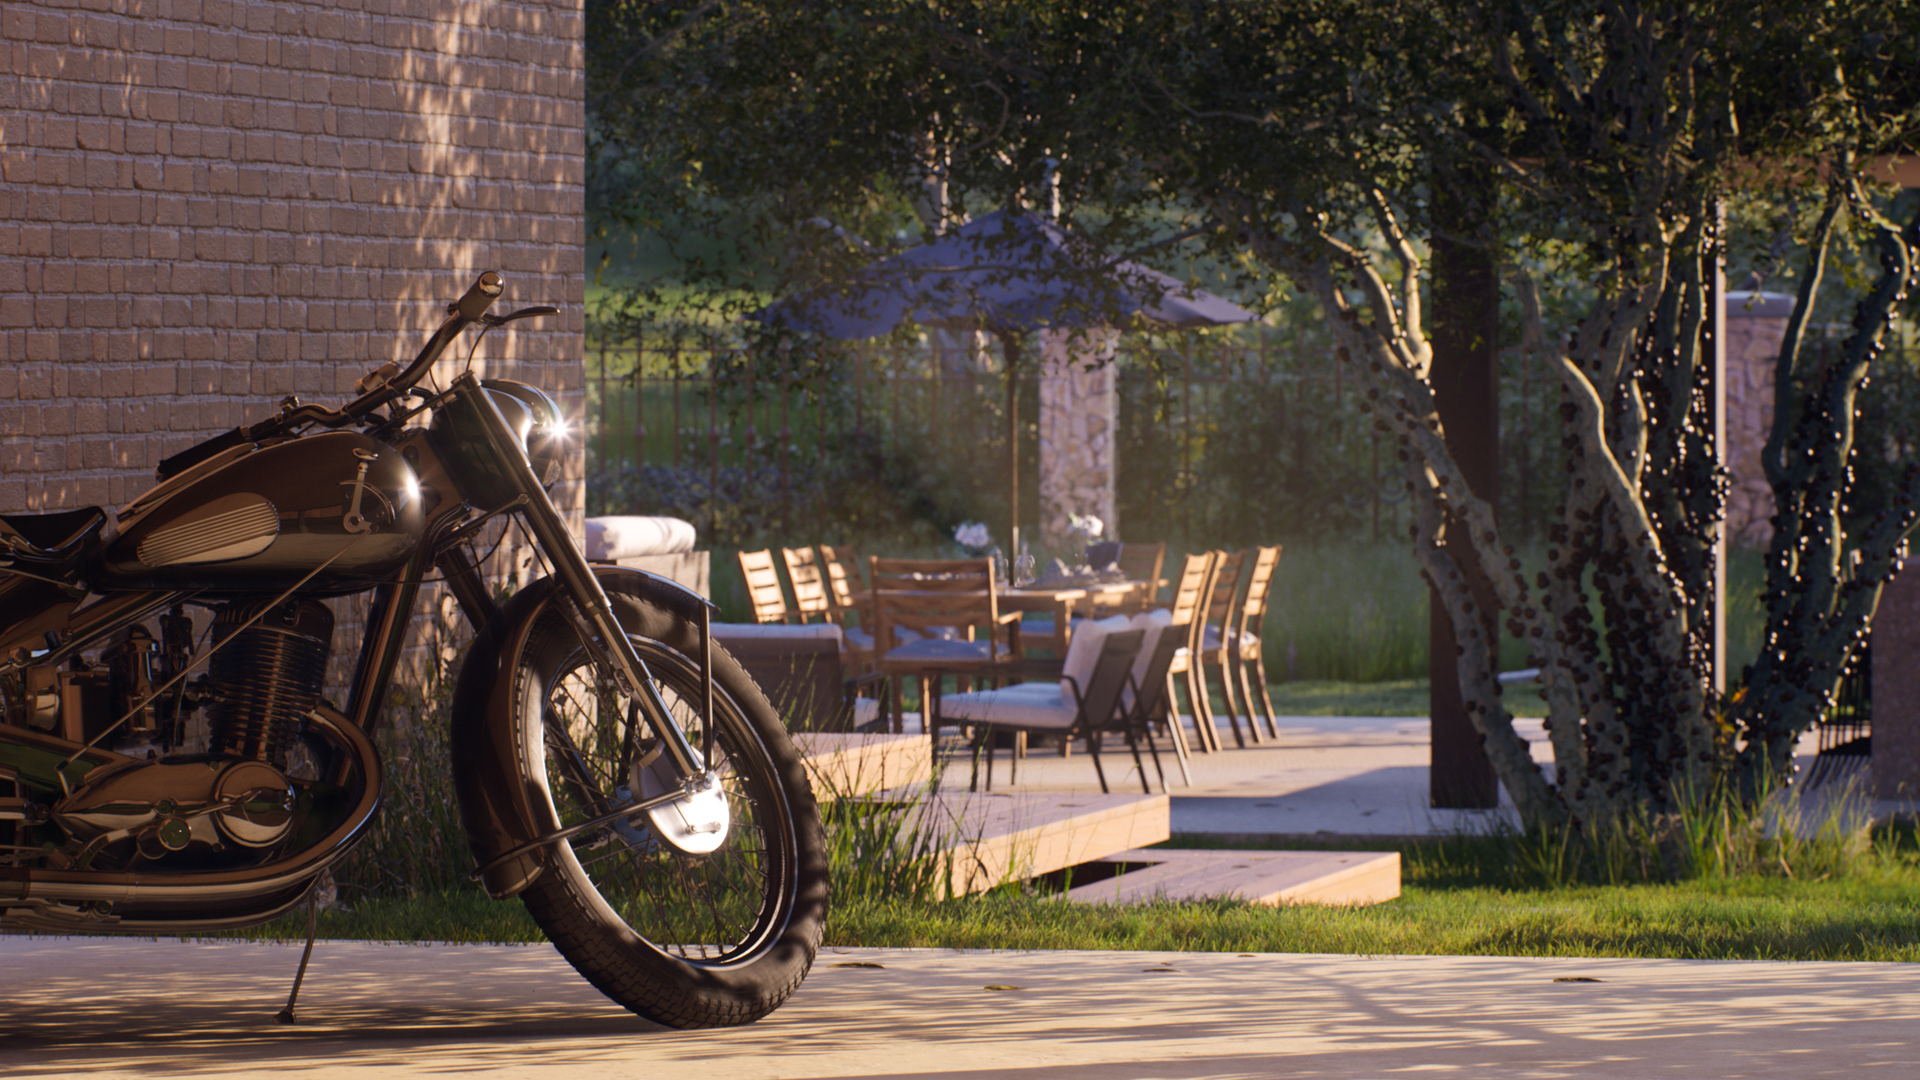
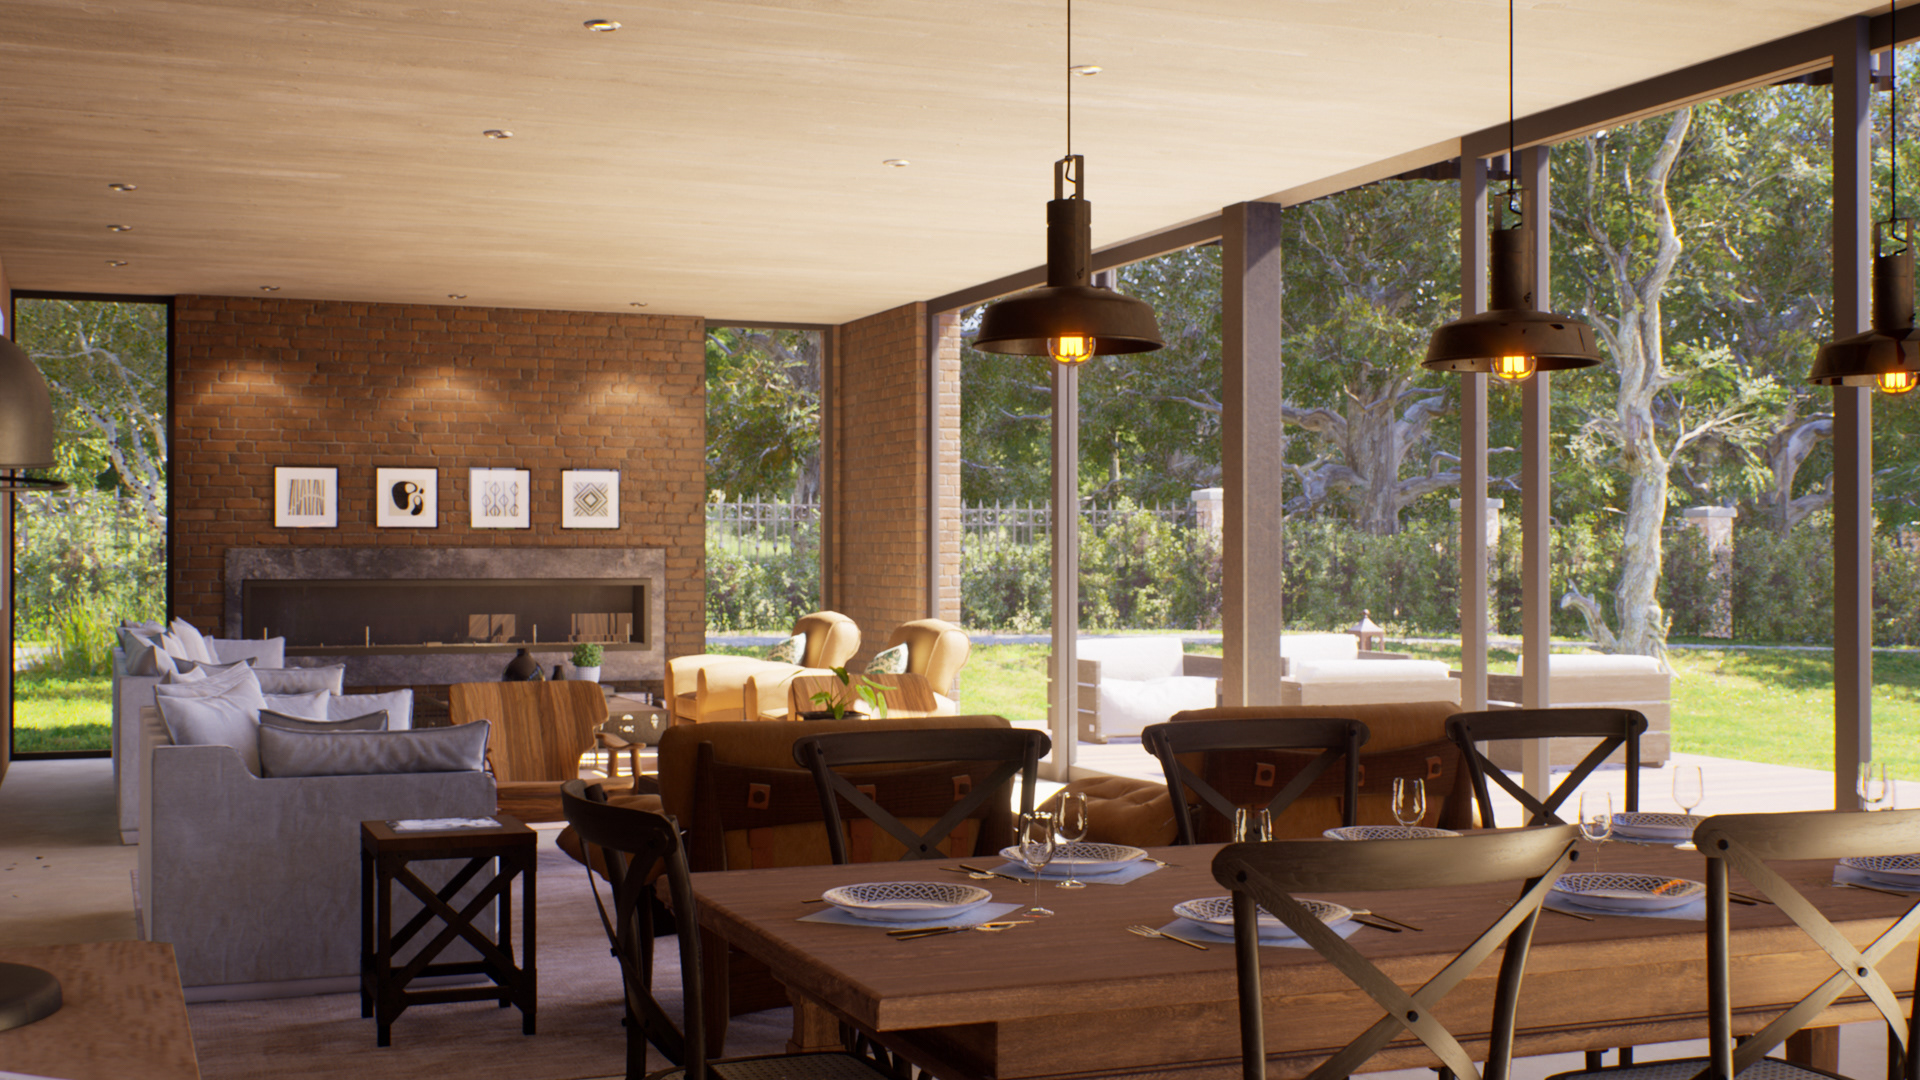
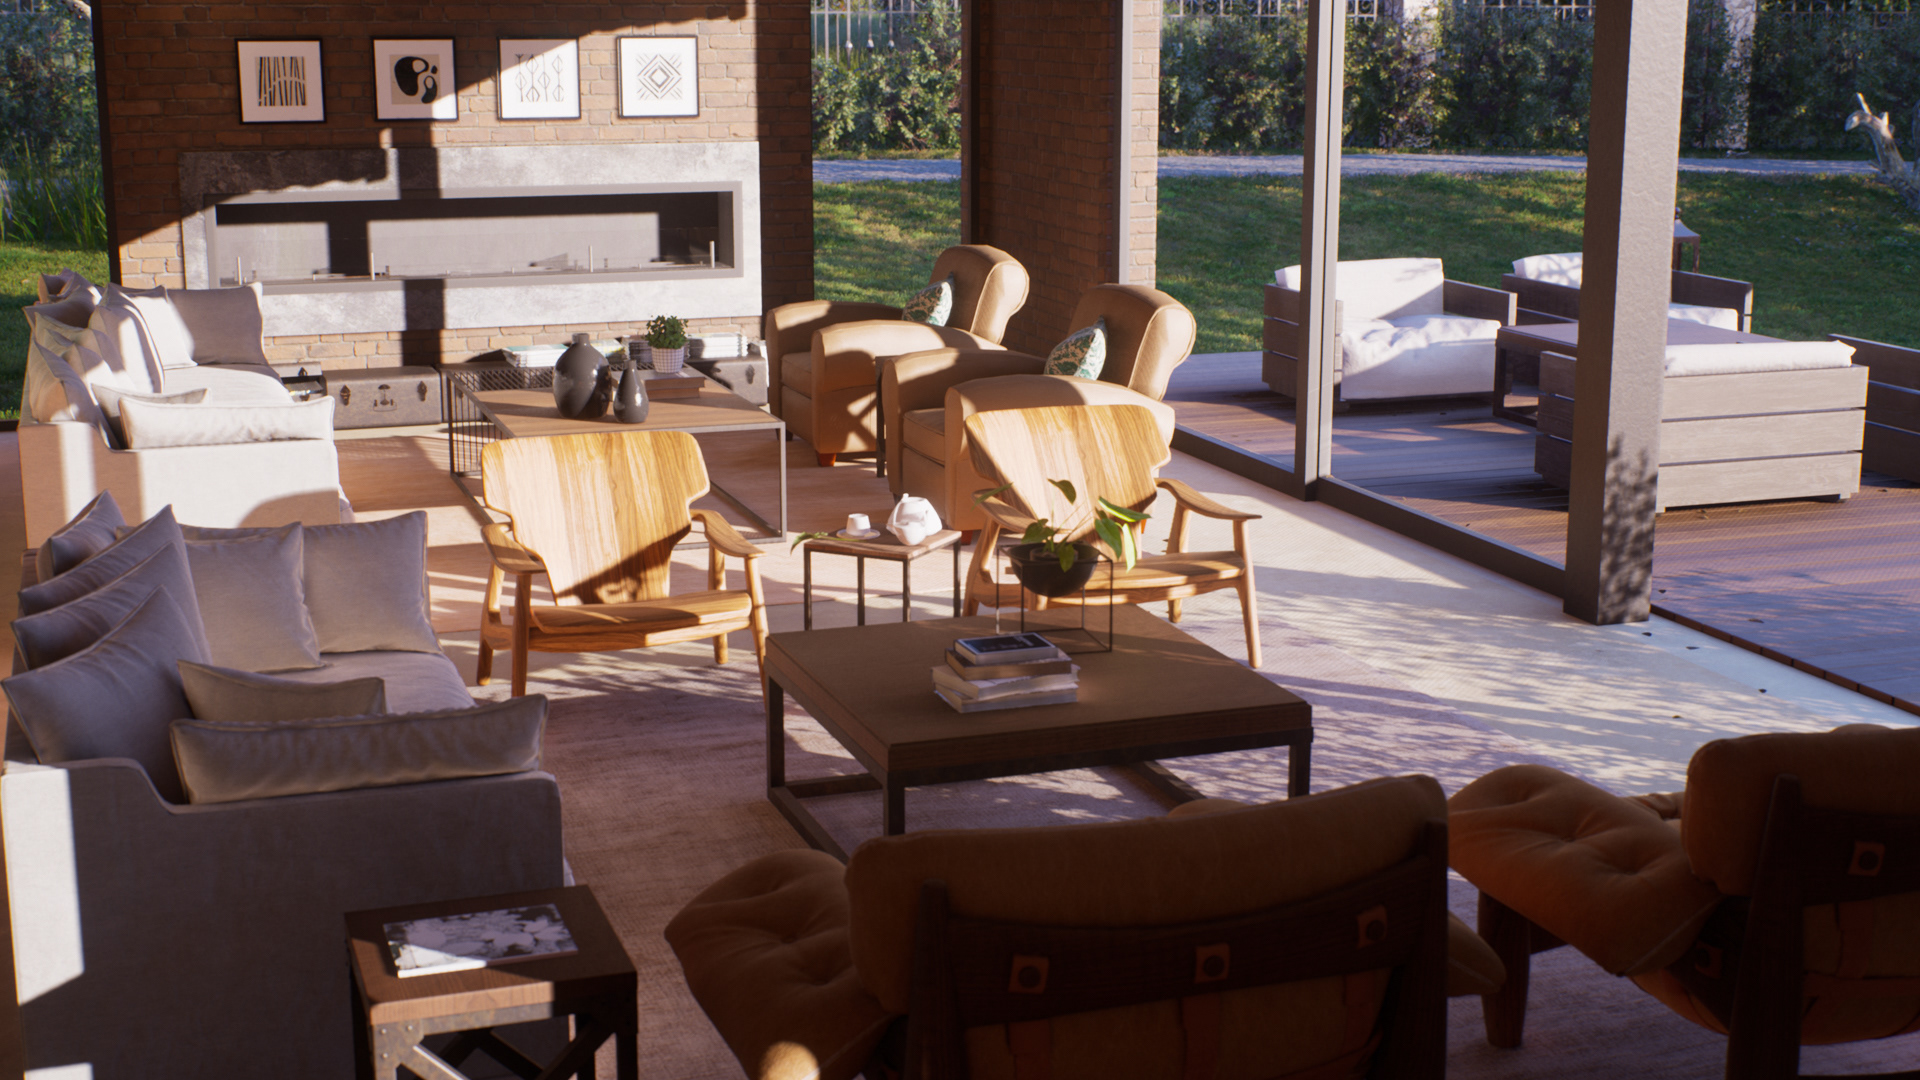
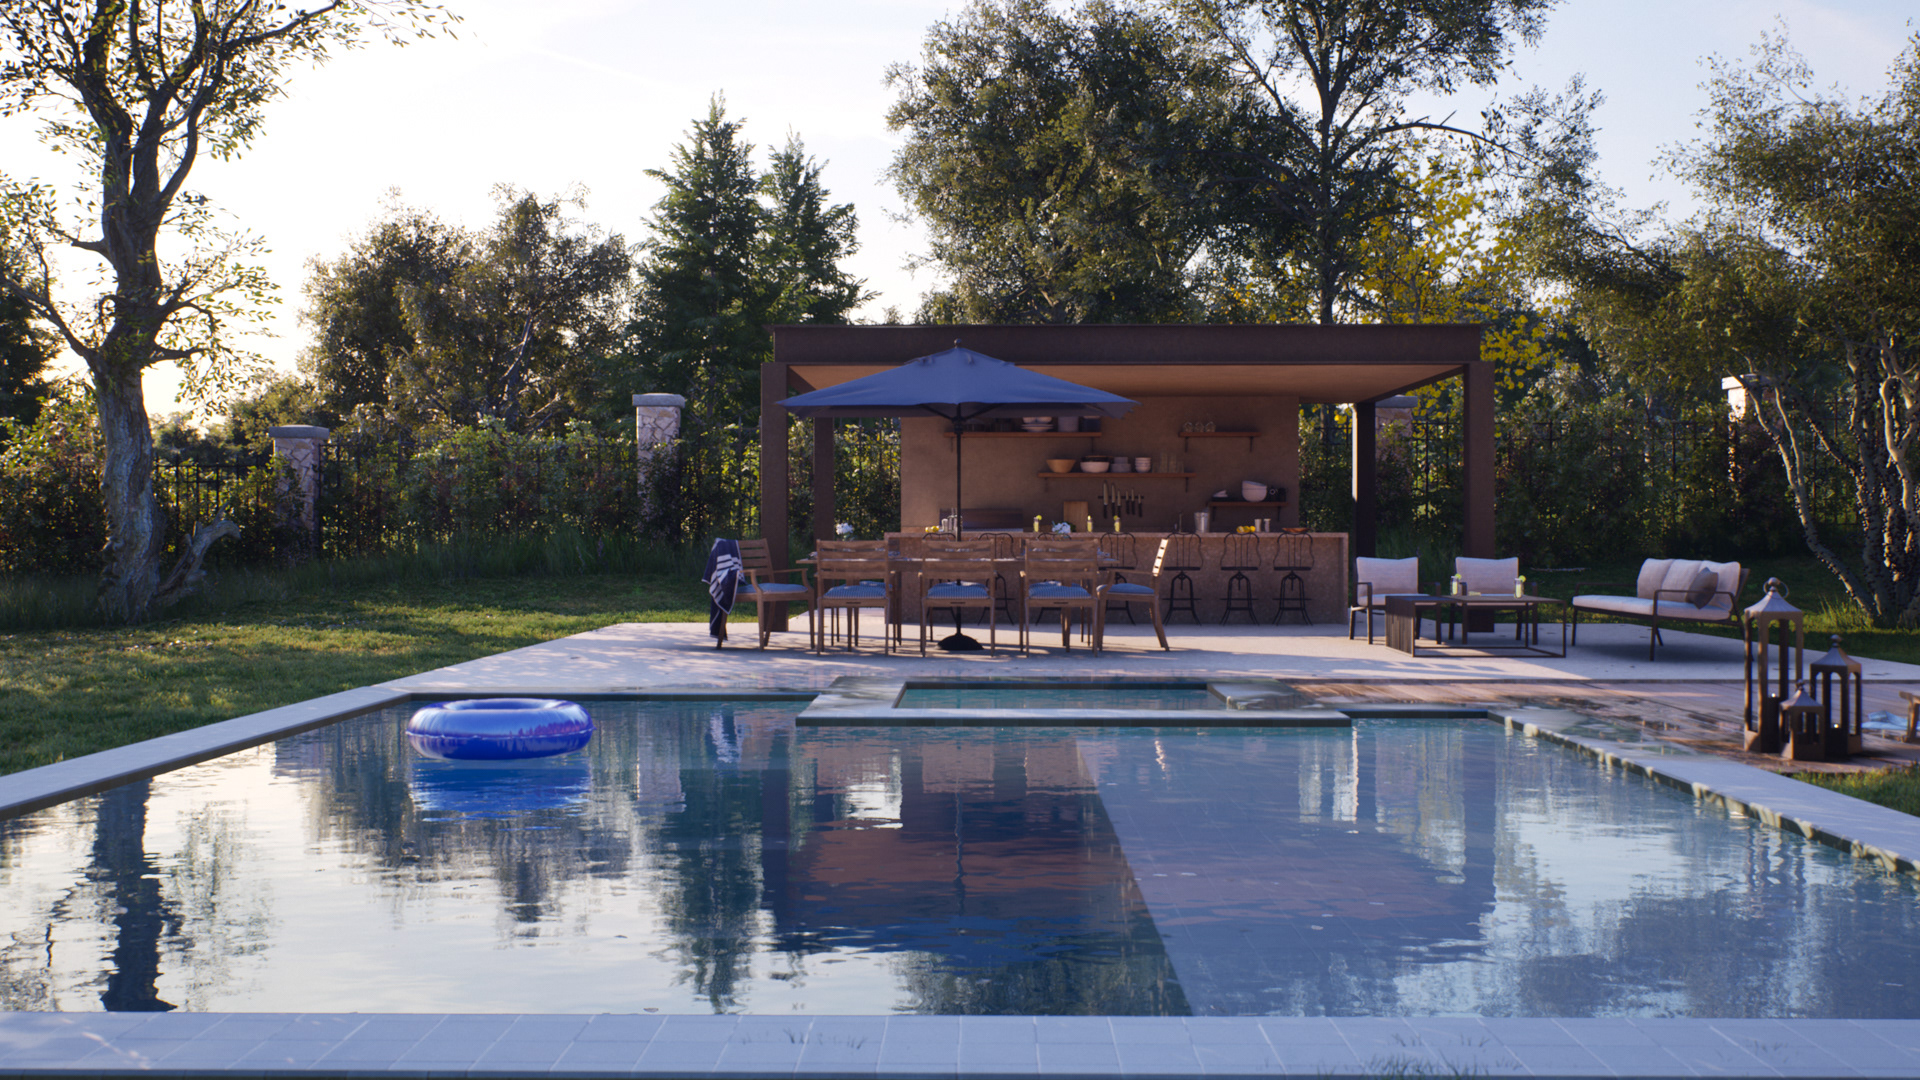
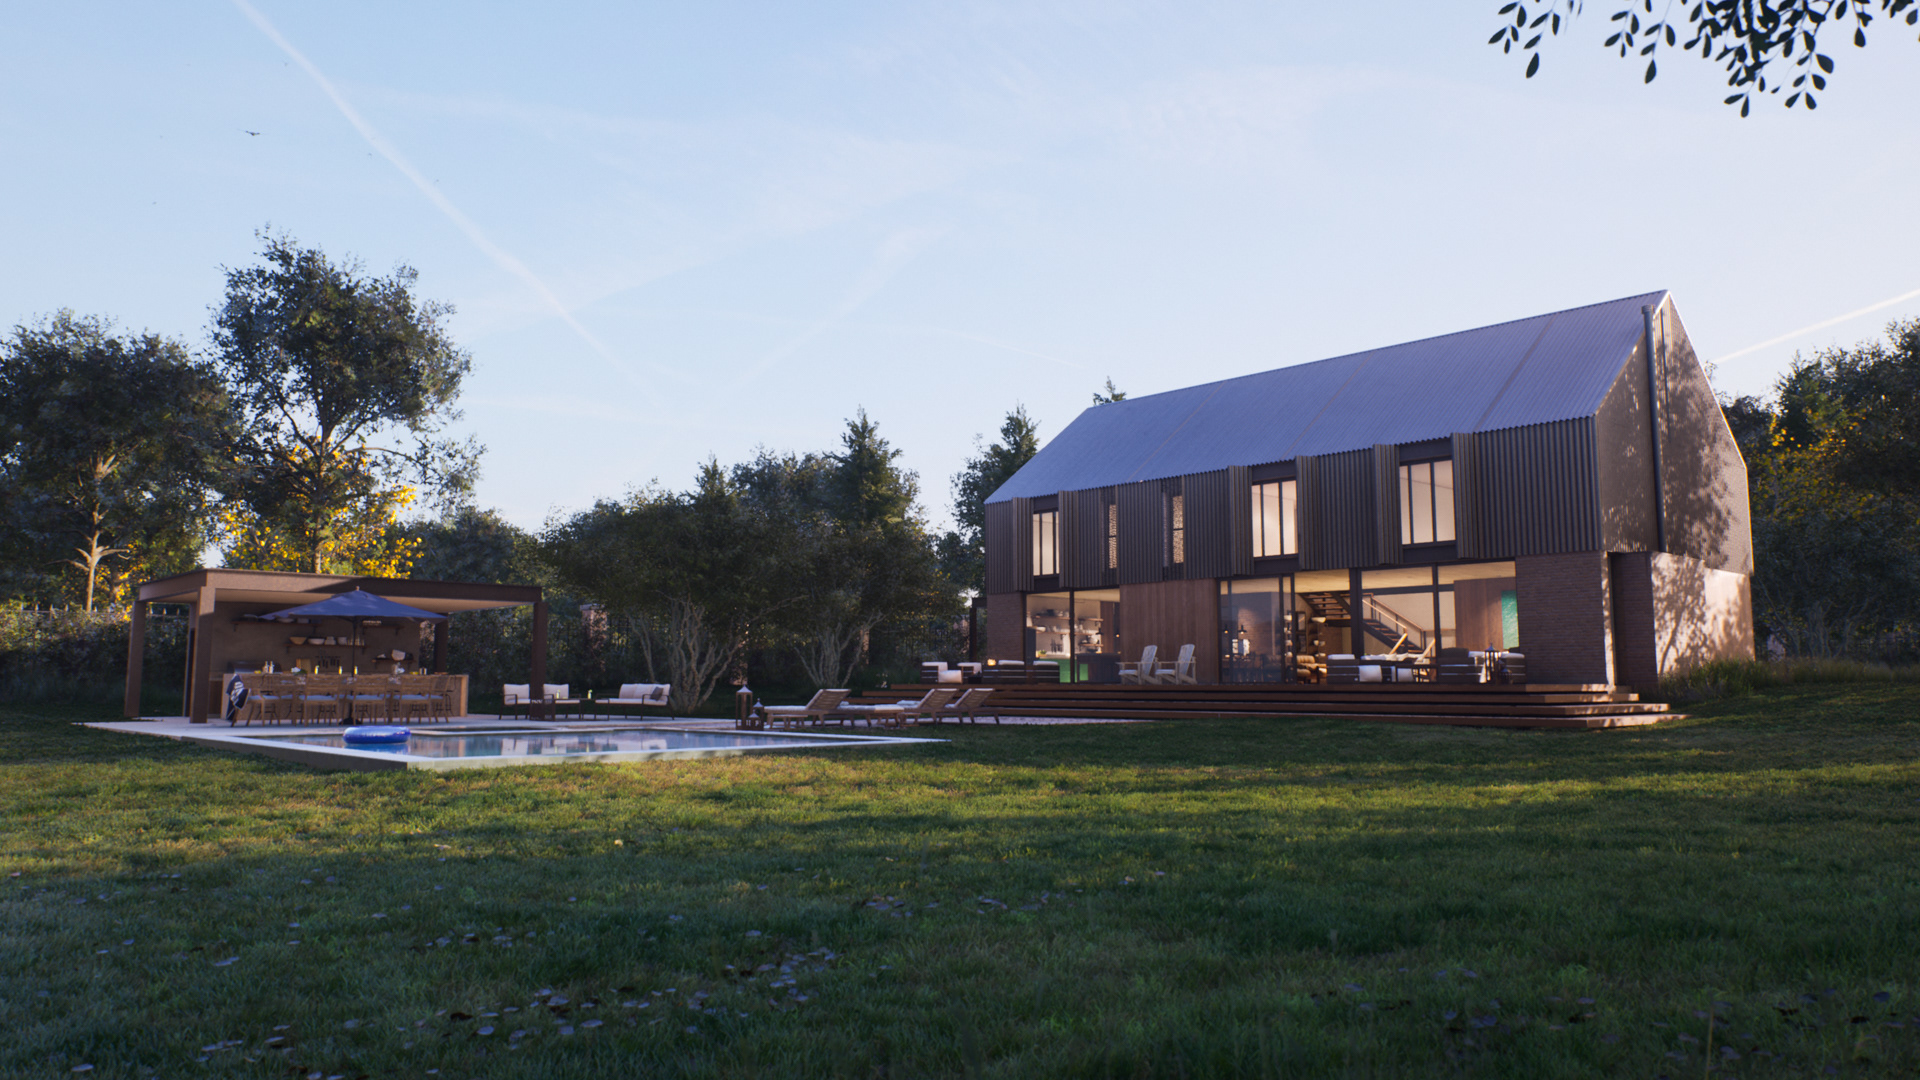
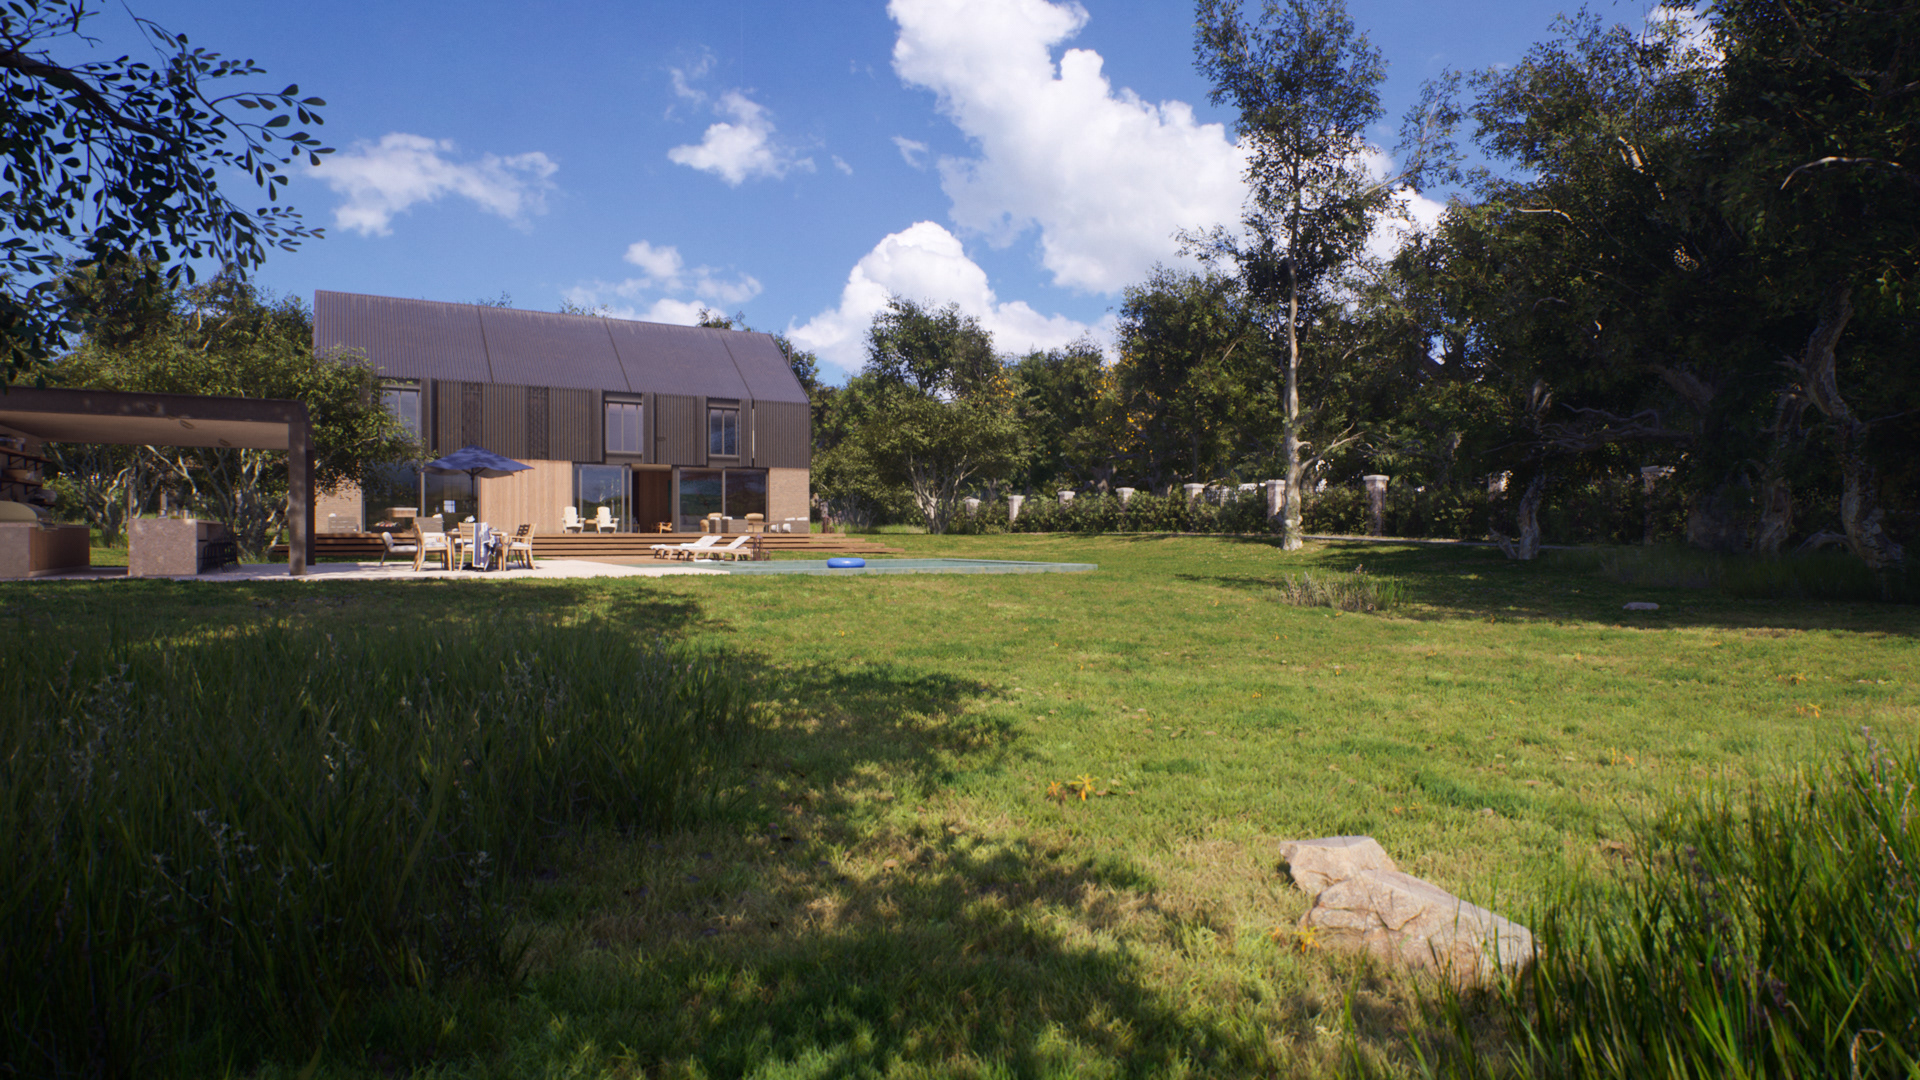
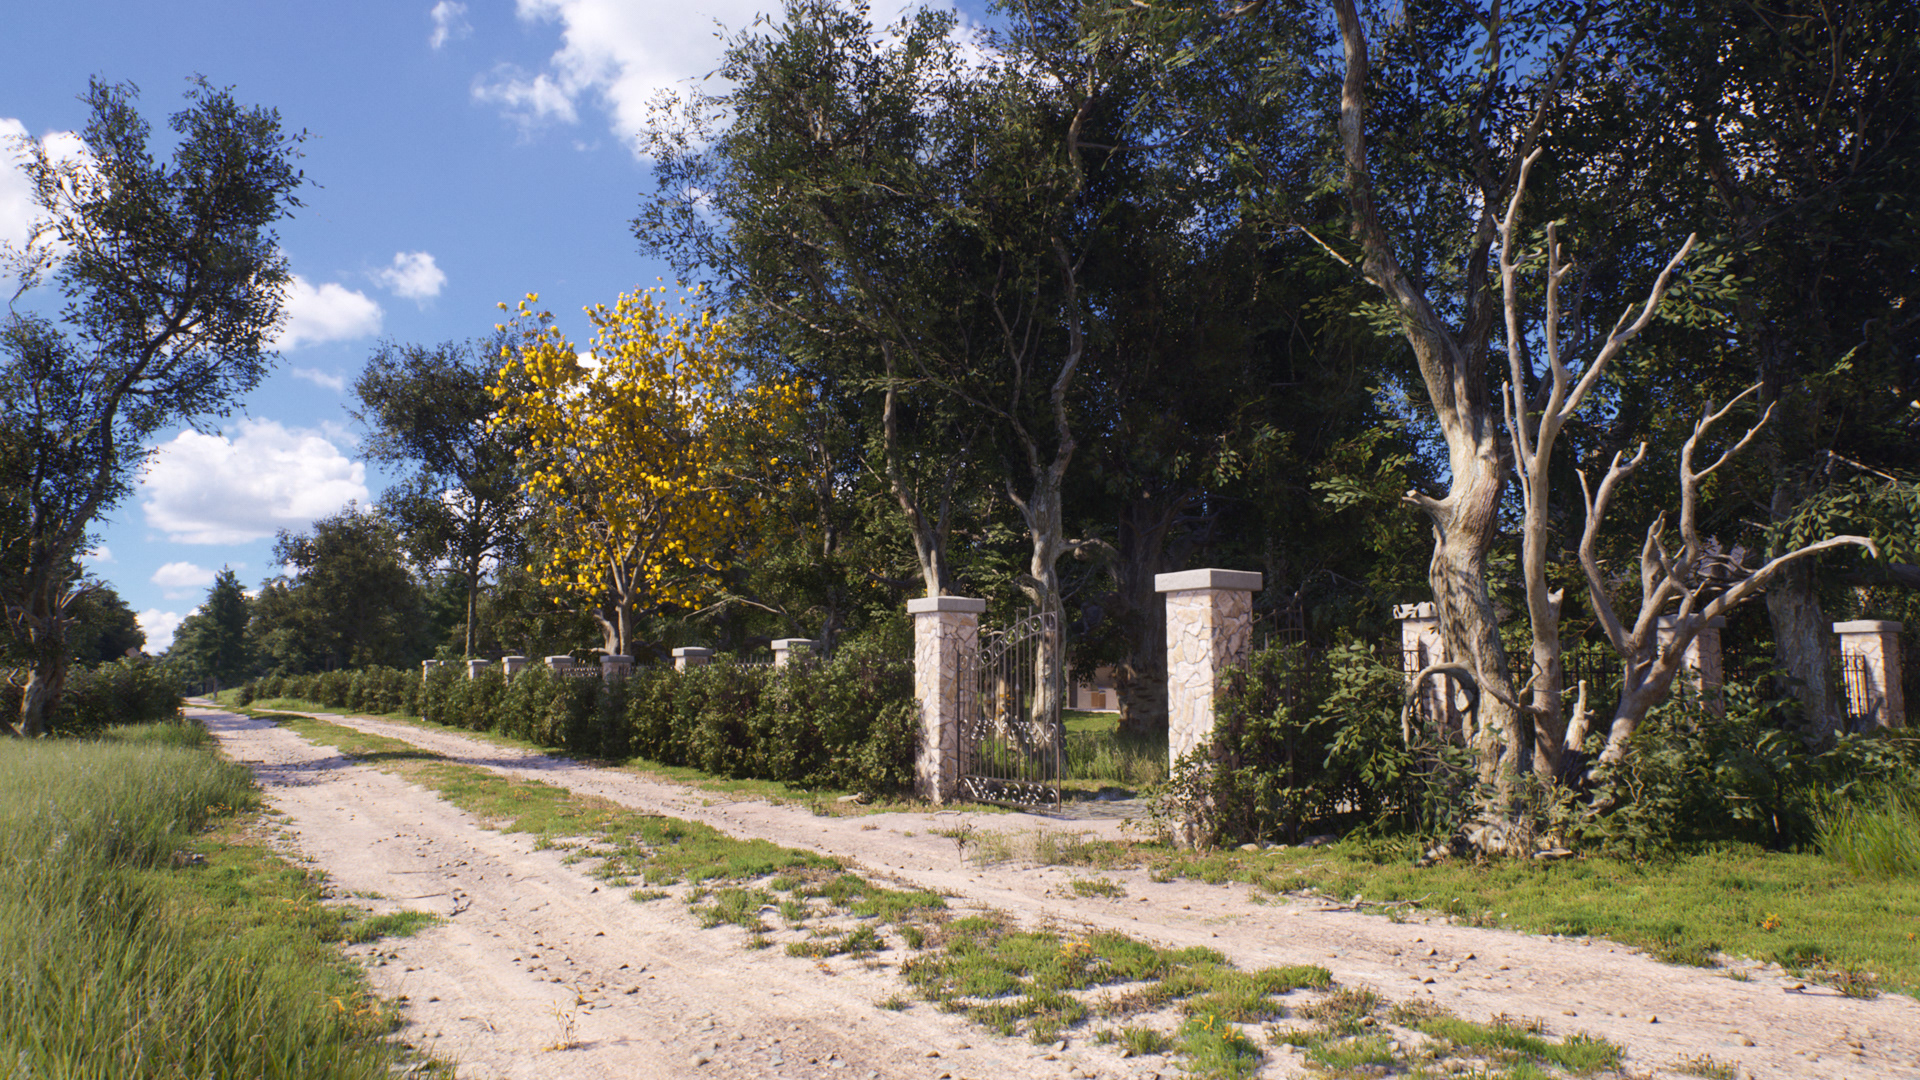
An architectural visualization of a modern barn styled house surrounded by a countryside area of 10km². The project is optimized to run in real-time at 30fps 1440p on a GTX1070.
As the 3D Modeler and Unreal Engine Generalist, I created the entire visualization project from scratch. From modeling the house based on the architect's blueprints to setting up the UE project, generating stills, videos, and the interactive application.
Project featured on:
First place on NVIDIA Edge Program
Epic Games VR Dev Grant
Ronen Bekerman Reality Check
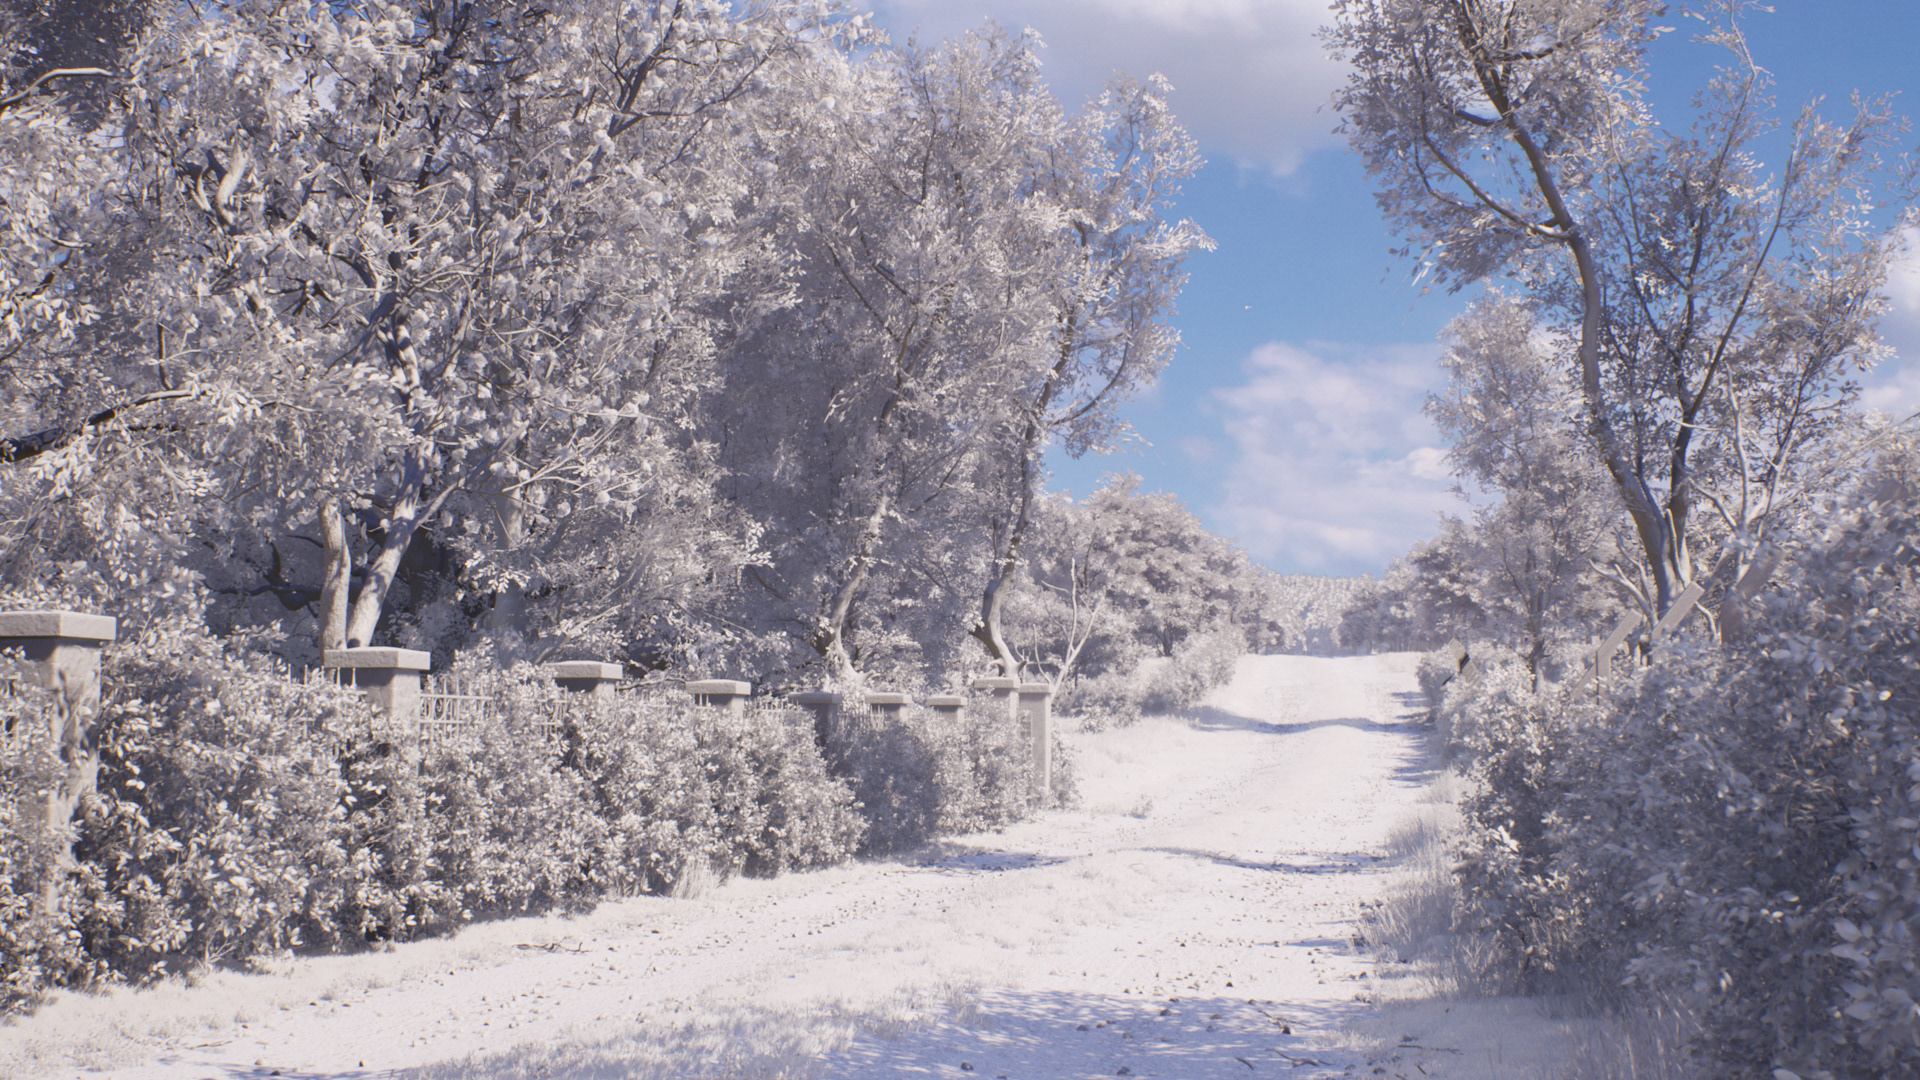
"Lighting Only" view mode showing dynamic light and DFAO in action
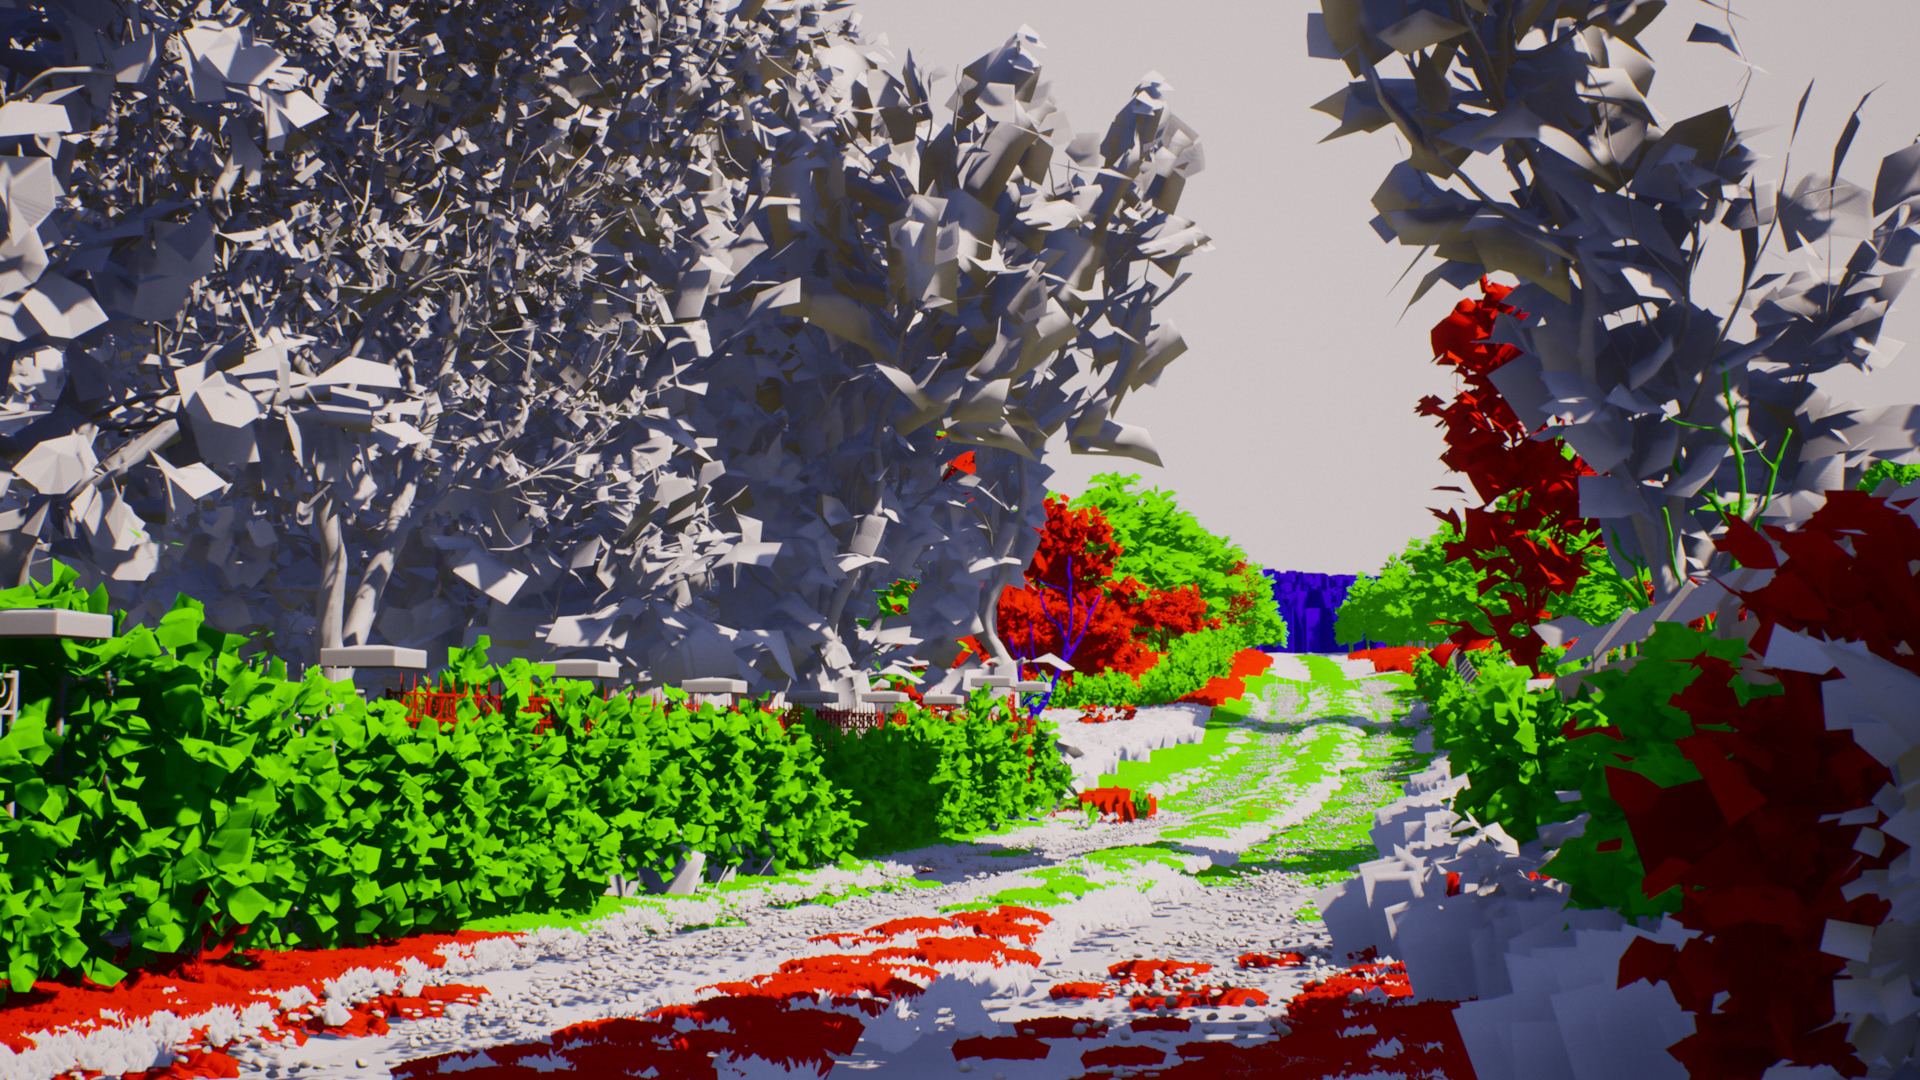
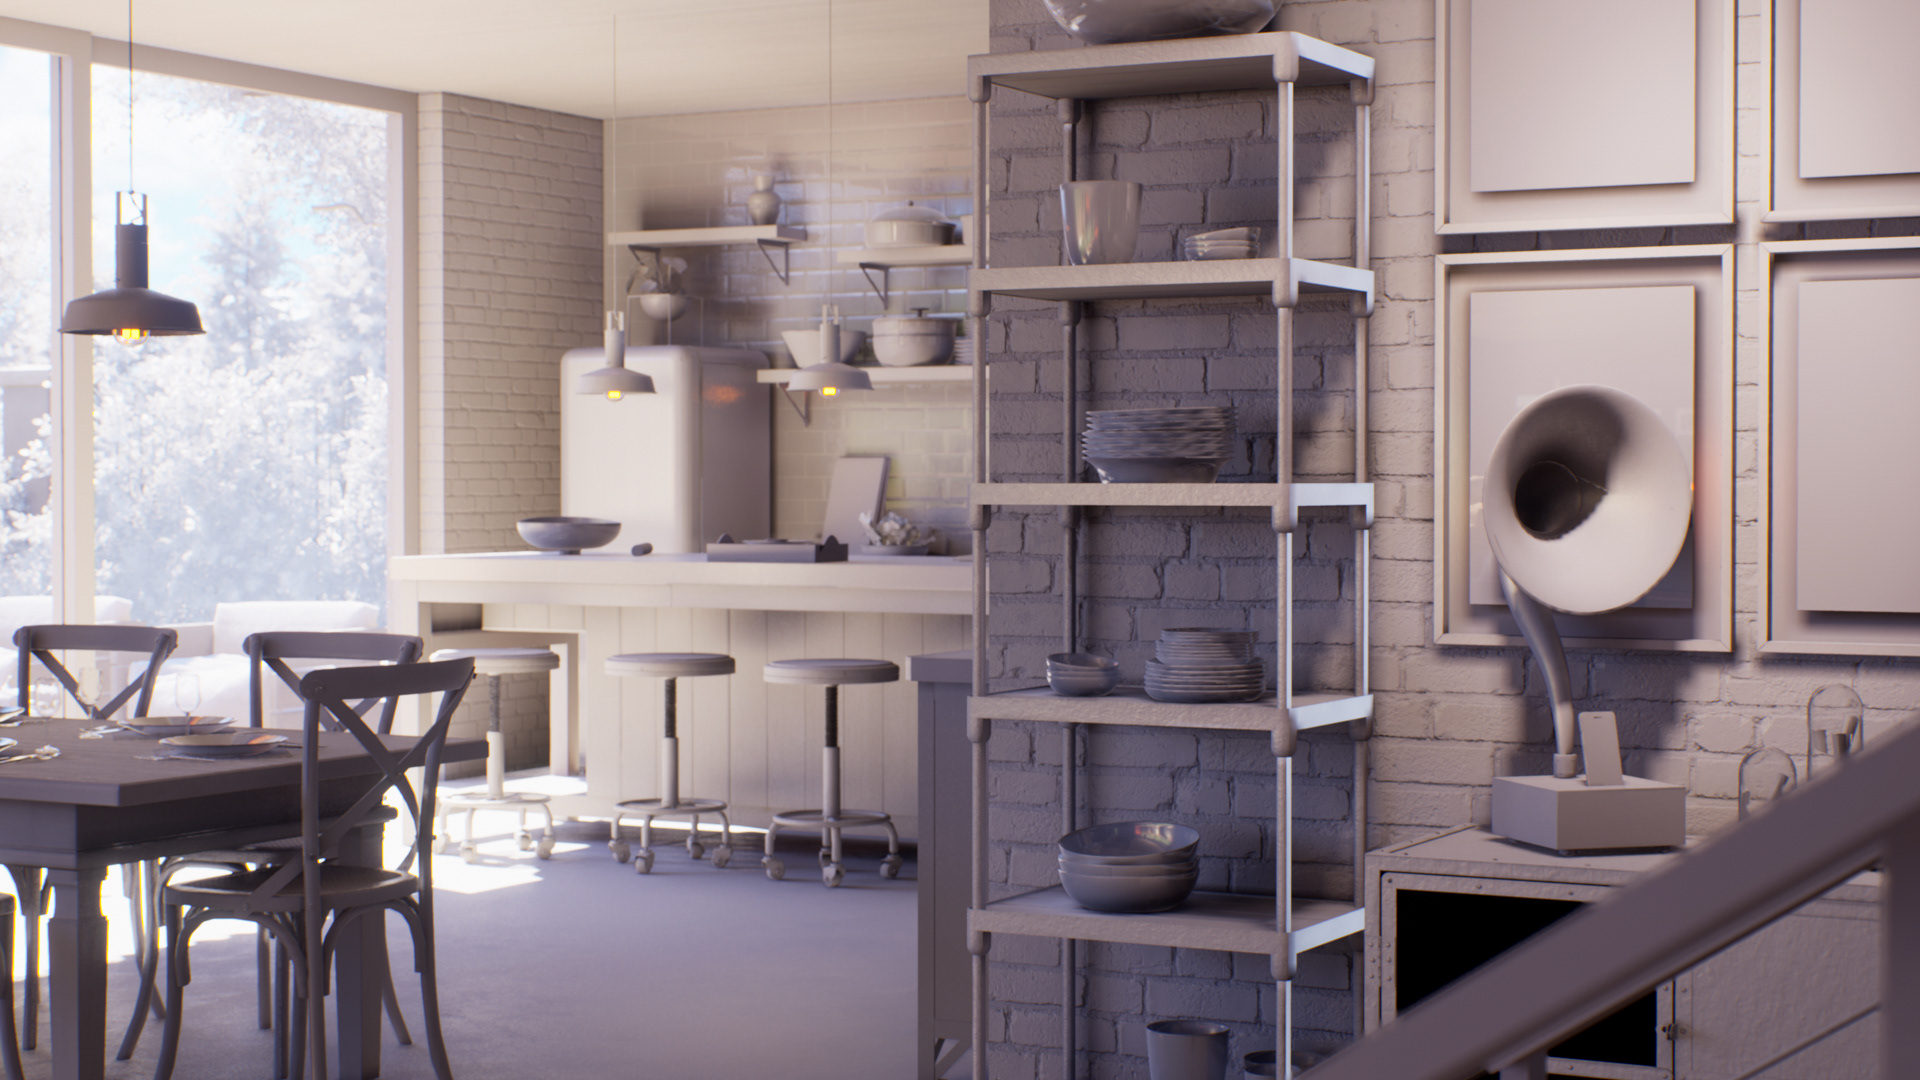
LOD visualization
The lighting
Direct Light (Sun), Sky Light and Sky Dome with HDR texture.
Considering the project's size, I chose a hybrid lighting workflow that blends dynamic and static lighting. This approach enabled high-quality precomputed GI (Global Illumination) only for the house and furniture, without the need to compute lightmaps for the entire extensive map.
While the absence of GI on the foliage isn't as critical for realism as it is for the building, relying solely on DFAO (Distance Field Ambient Occlusion) was insufficient for achieving proper occlusion on certain assets. Combining it with SSAP (Screen Space Ambient Occlusion) was not an option as this technique has global impact and it would exacerbate the static AO baked into the building meshes by Lightmass, leading to unnatural look.
To address this limitation, I baked AO data into the one vertex color channel of the foliage assets in external software (3DS Max and SpeedTree). In the foliage shader material, I used that data to darken Albedo, Subsurface and Specular values in the occluded areas, effectively emulating AO on a per-asset basis.
Although this technique breaks the PBR workflow and demands manual tweaks for different lighting conditions, it allowed me to achieve a level of realism that would be otherwise unfeasible with the tools available in UE 4.18.
the lawn was created with Foliage Tool and a simple cluster of planes scattered all over. The material does the magic with color and size variation

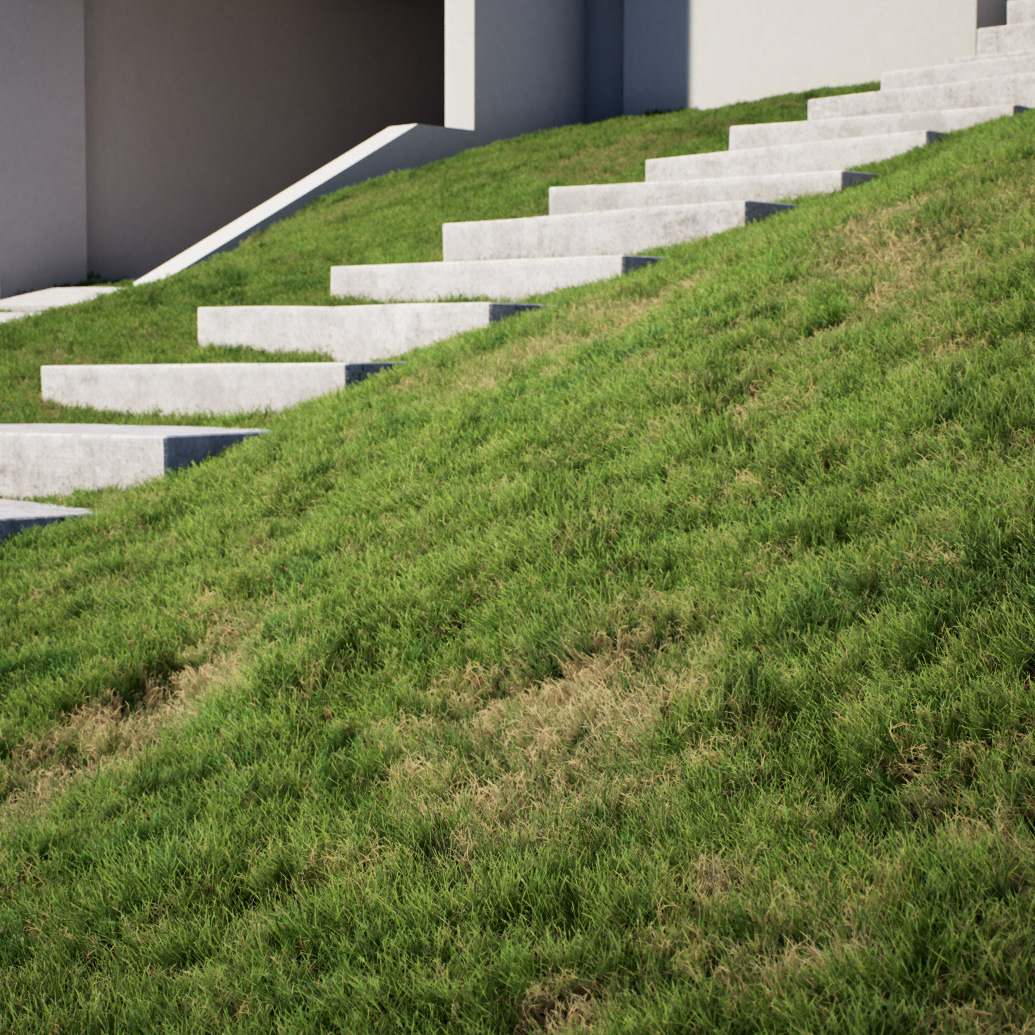
The environment
The 10 km² area was based satellite imagery and DEM (Digital Elevation Model) from several sources and put together with QGIS tool. The data was exported to Unreal Engine in proper formats to be utilized in a landscape actor.
The material was created with three "sub-materials" organized with Material Functions and driven by Landscape Material Layers:
Base Satellite: Sub-material with 4k satellite texture covering the entire landscape. It's used only for distant background regions and also as basis for painting other sub-materials.
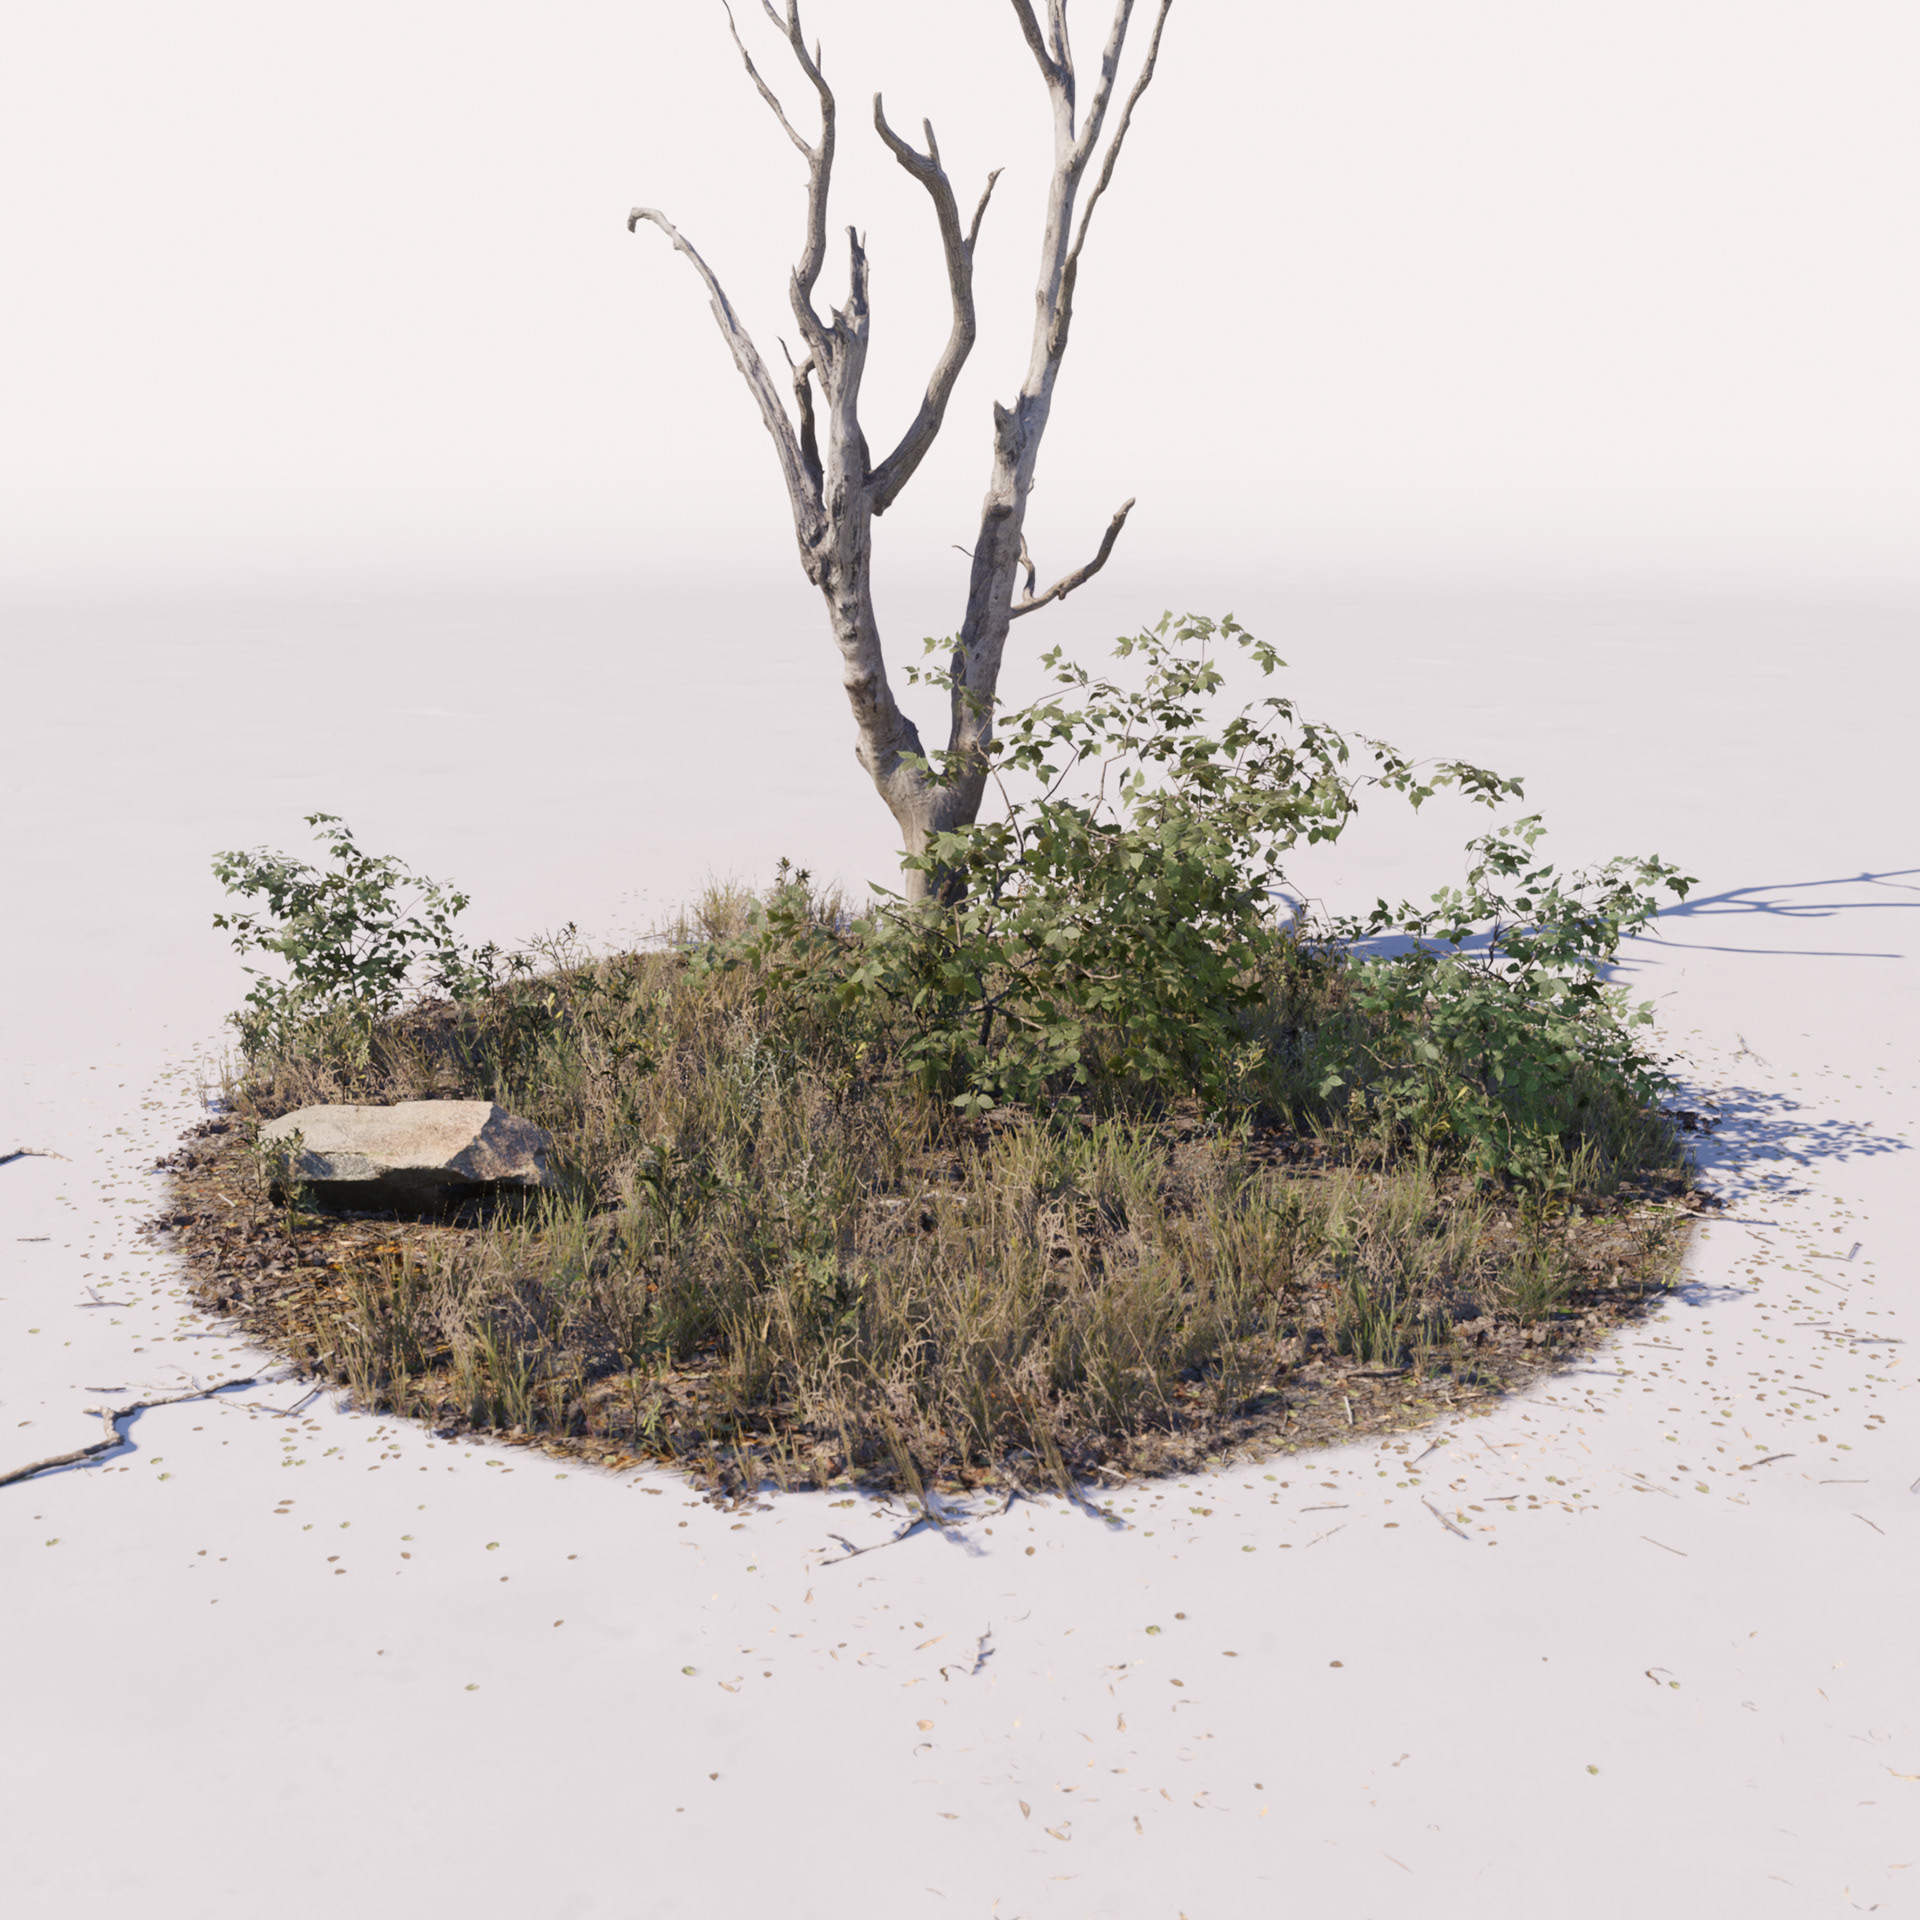
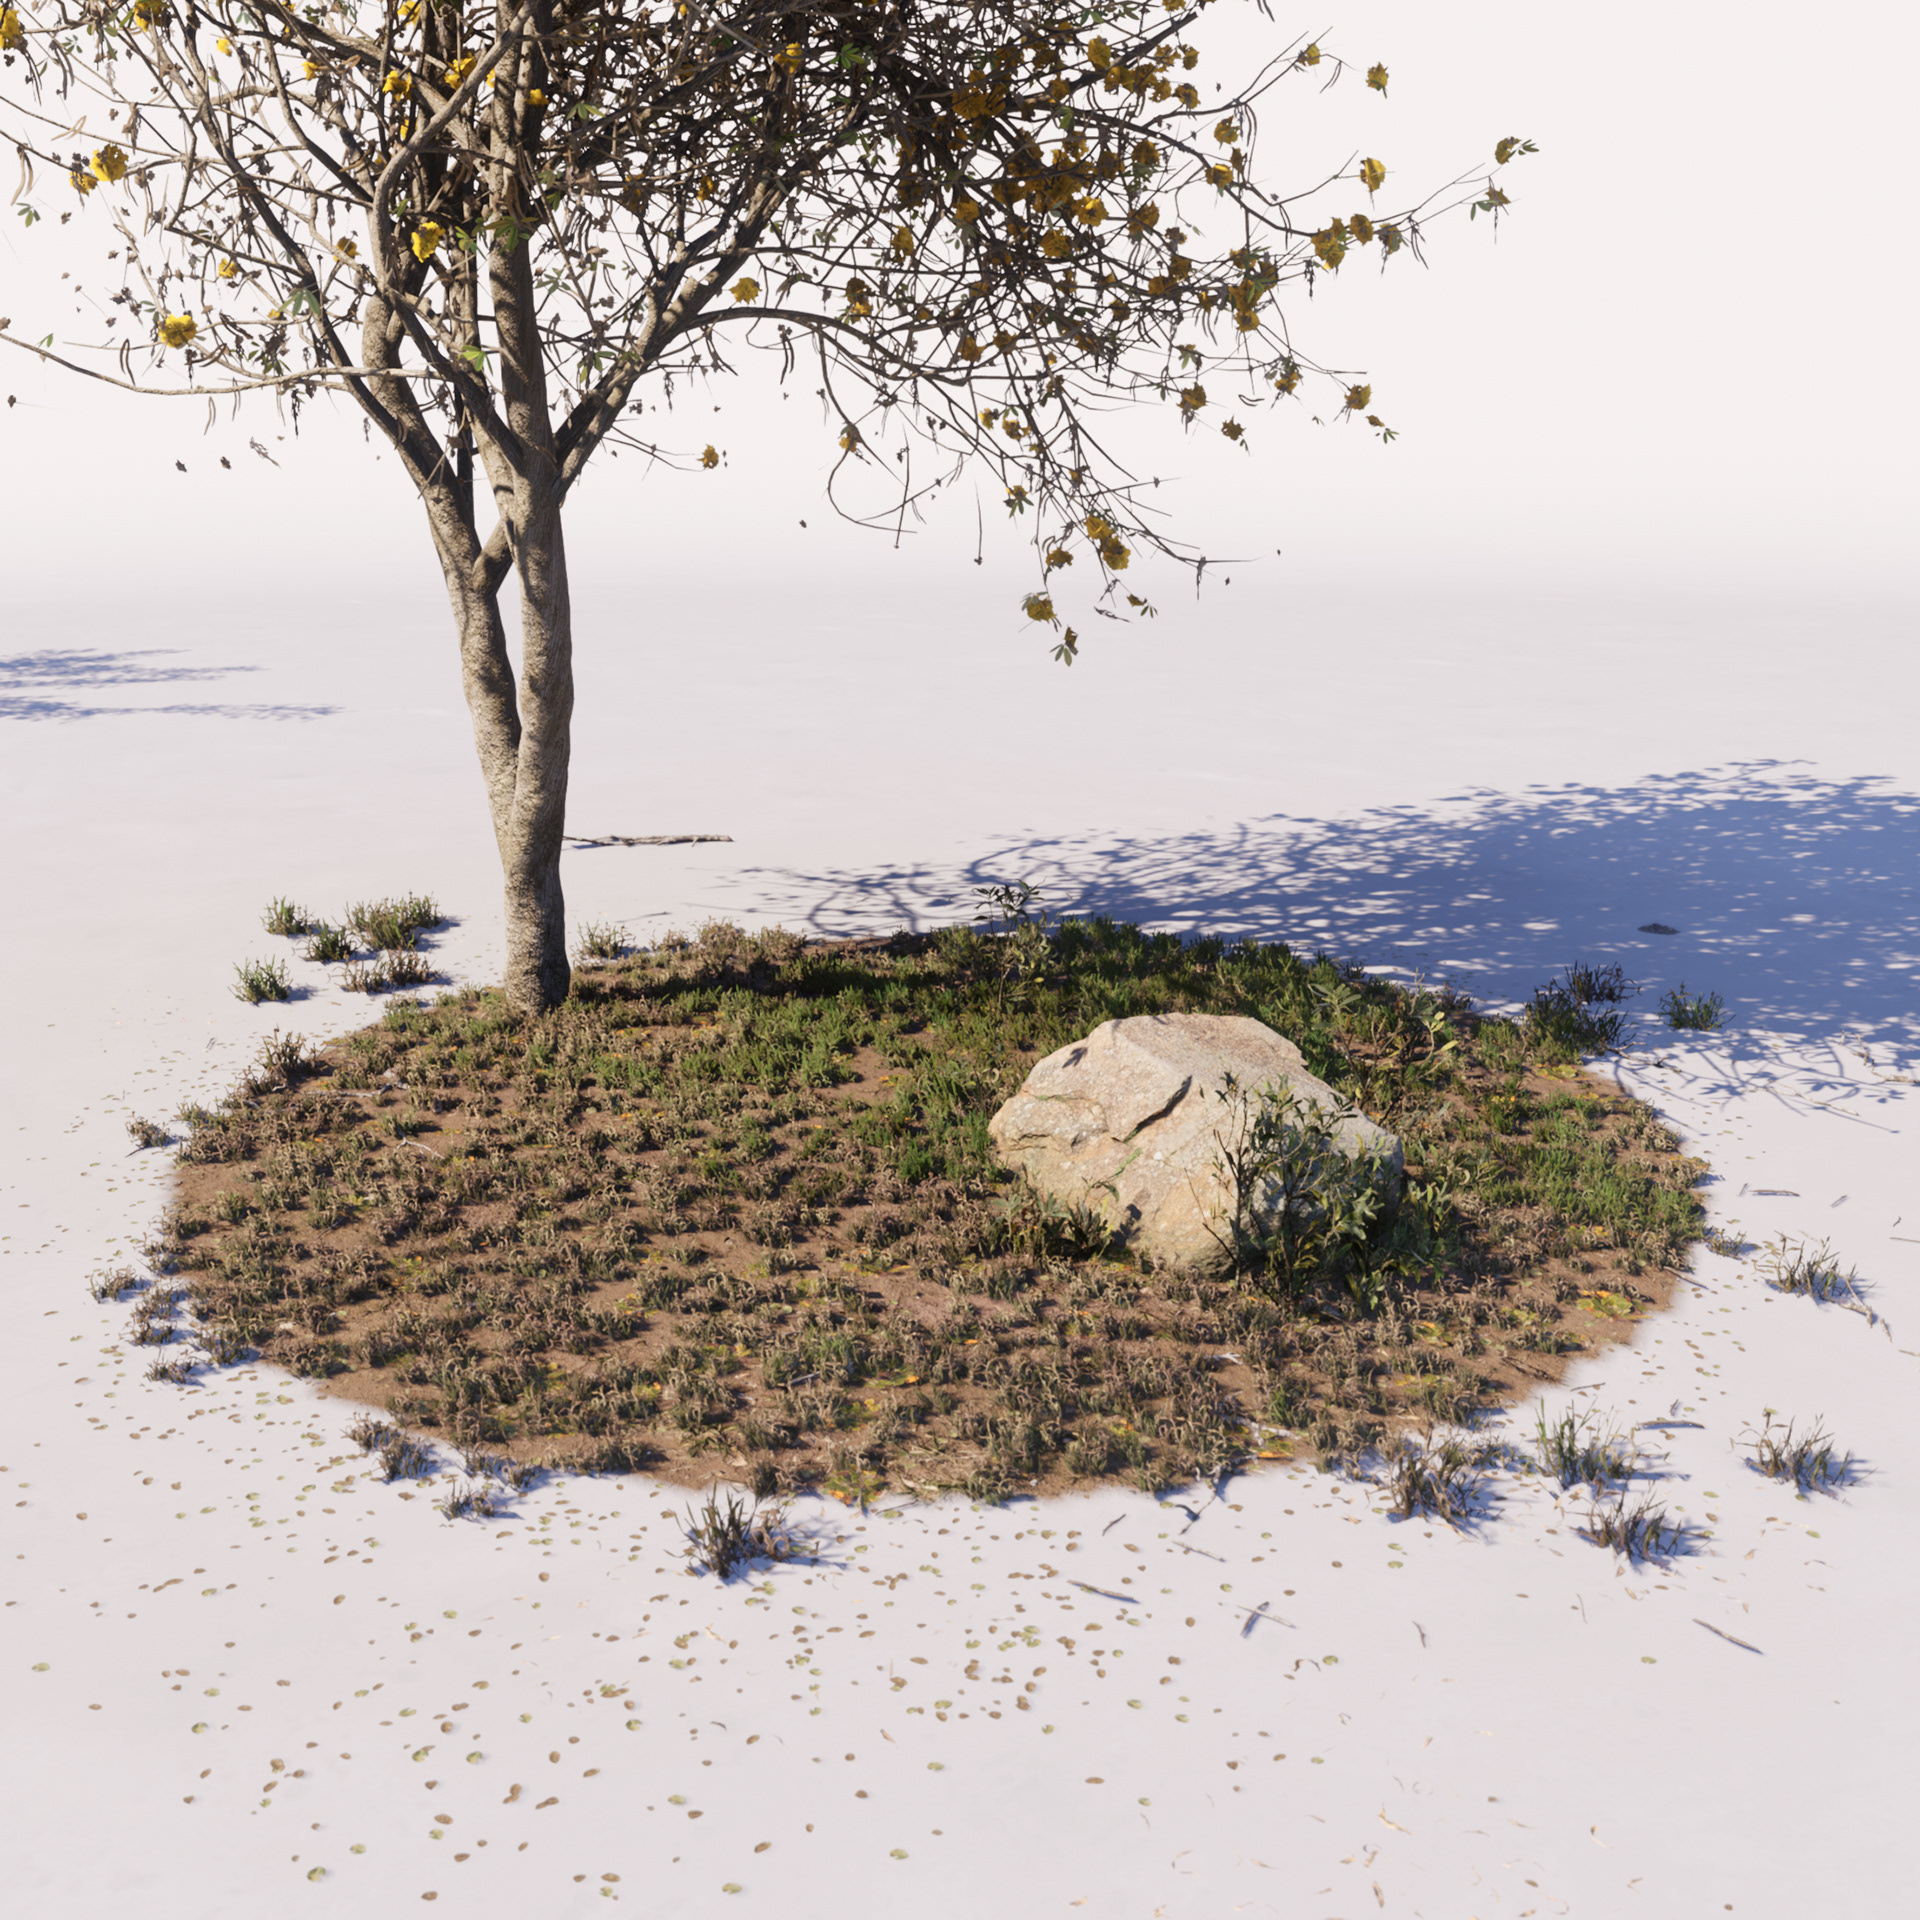
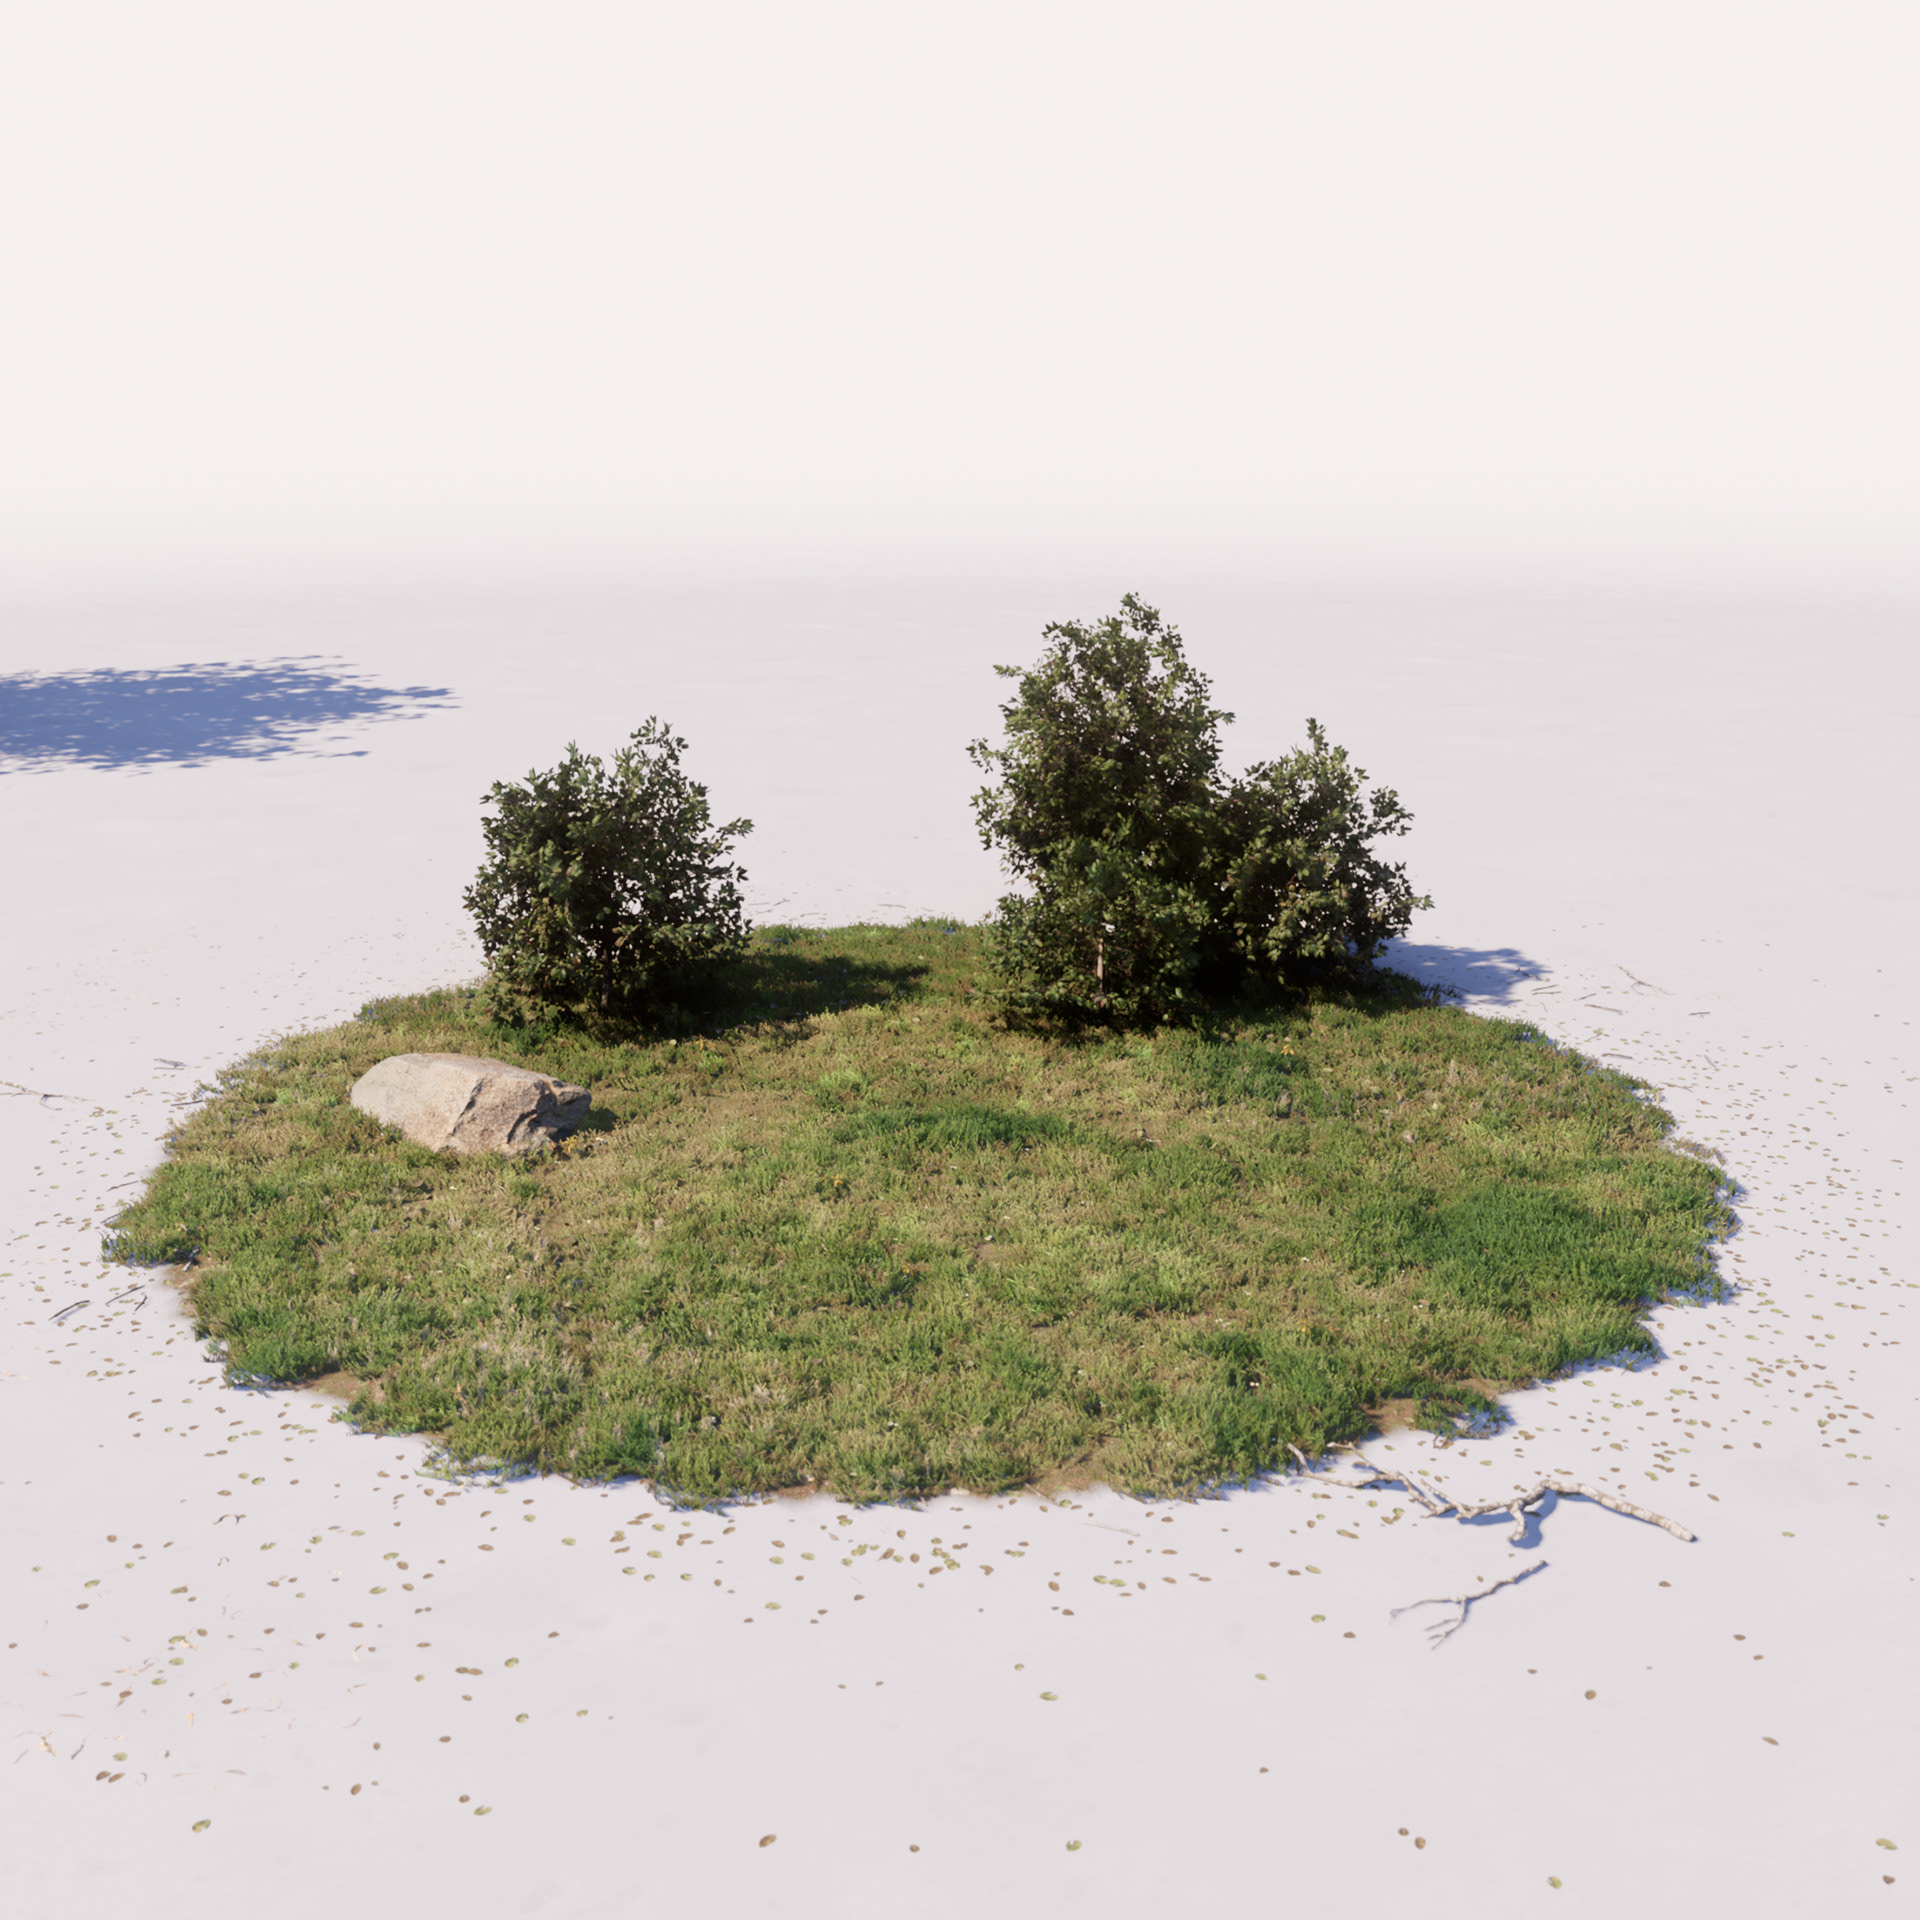
Grass: Sub-material used on any region where should be types of grass assets on top.
Dirt: Sub-material for regions where should be dirt.
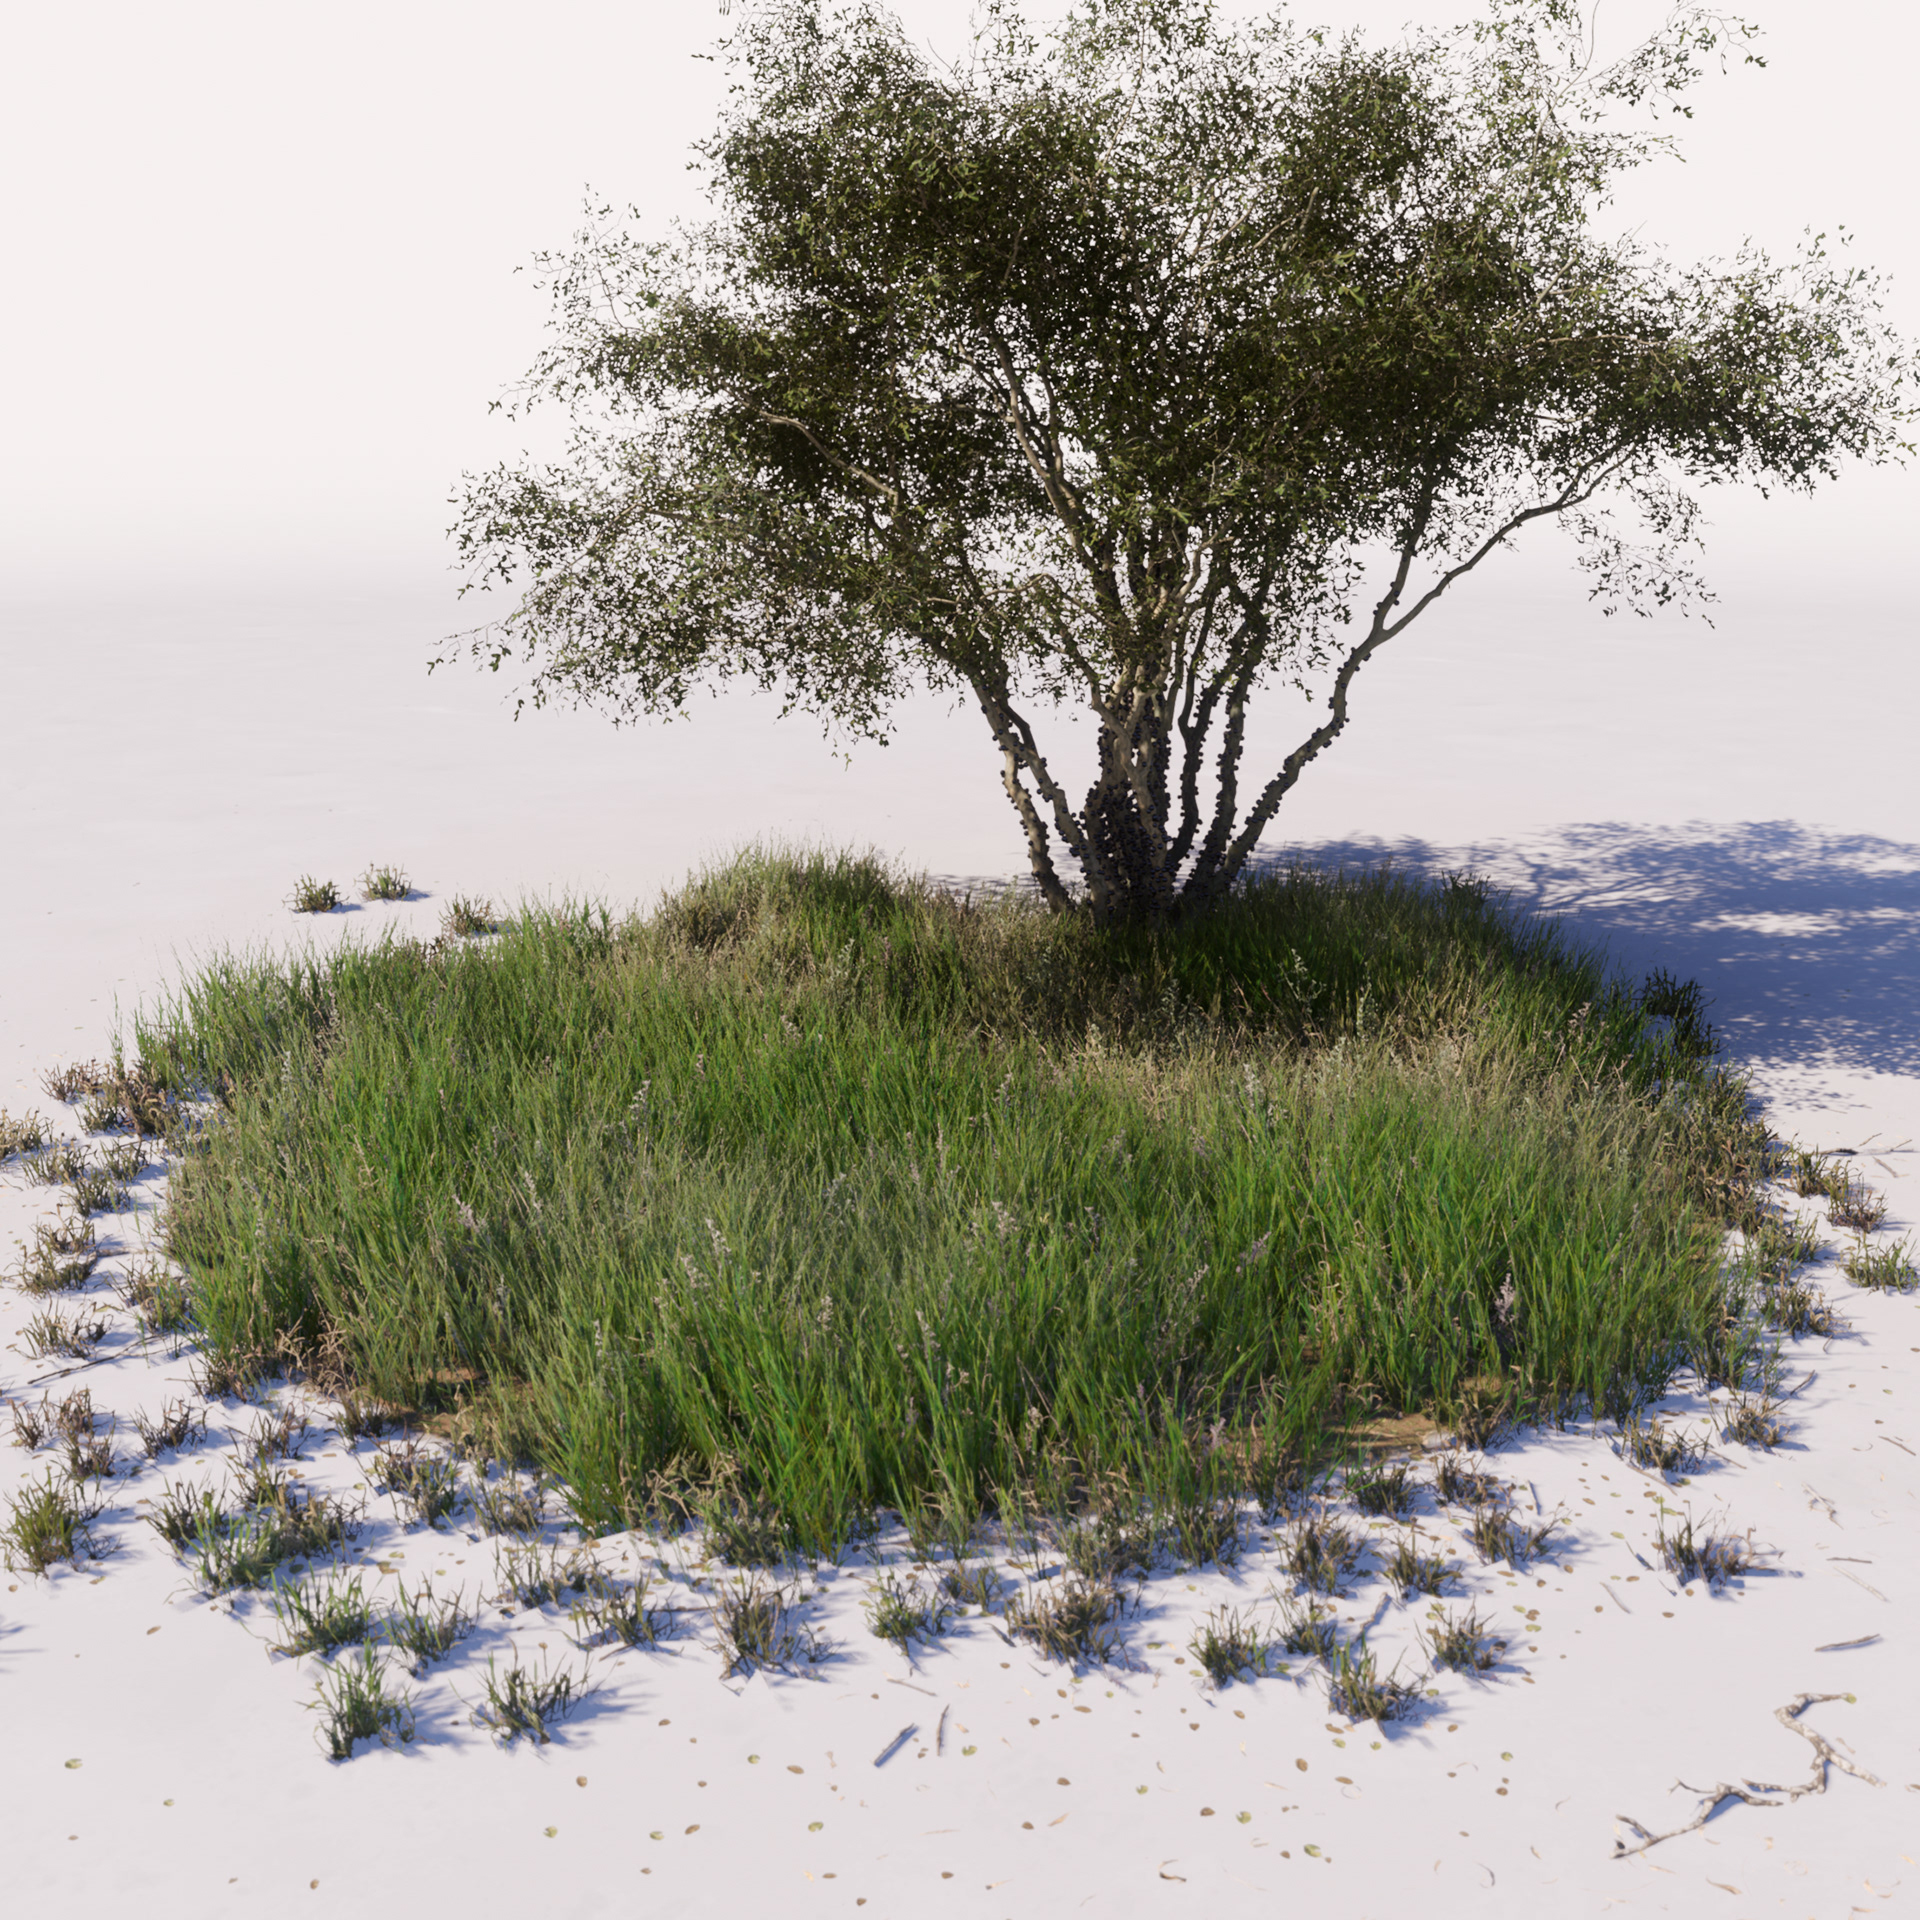
Most of the foliage in the scene was procedurally scattered with the Landscape Grass Tool. Different Landscape Grass Types were created to reproduce the main biomes of the area driven by specific manually painted Landscape Material Layers. A single sub-material can be utilized by different landscape layers spawning different grass types.
The images bellow show spots of the 4 different biomes created with this technique for the project.
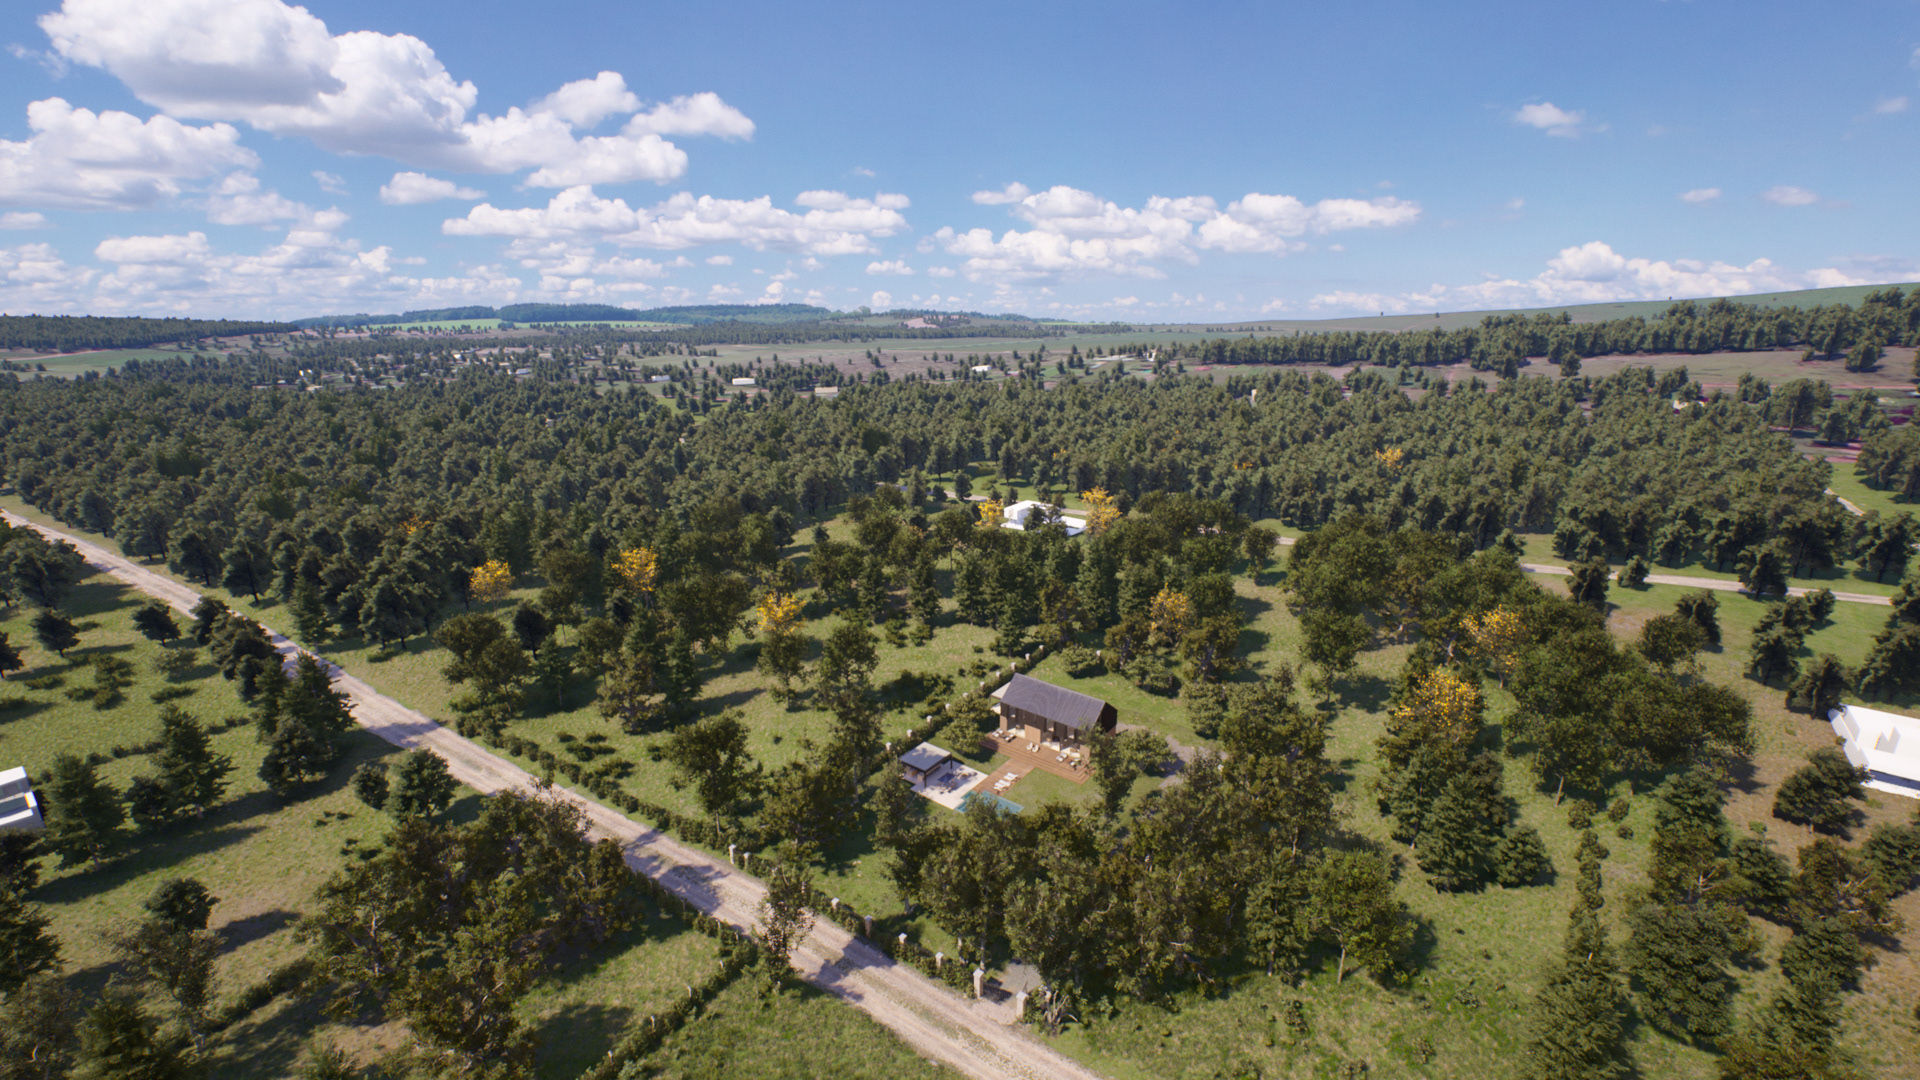
Aerial view from the center of the landscape.
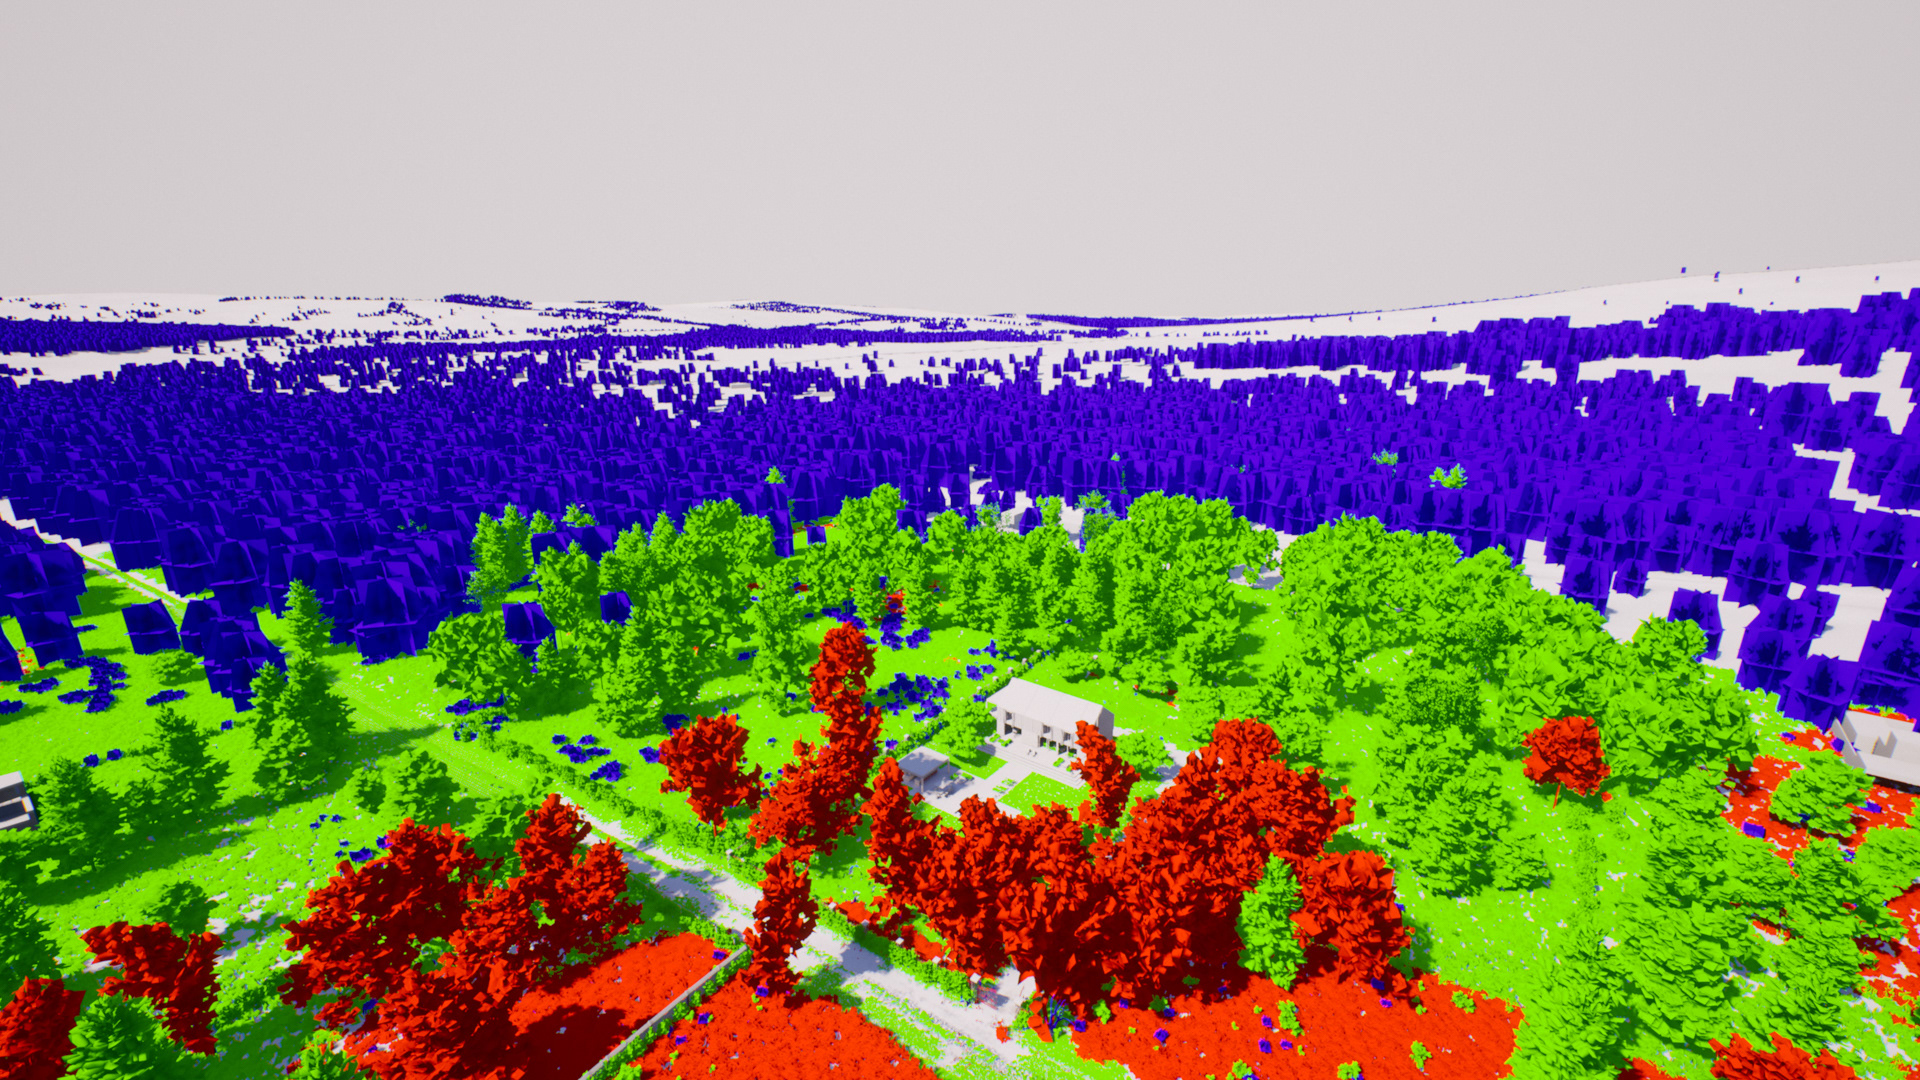
LODs view
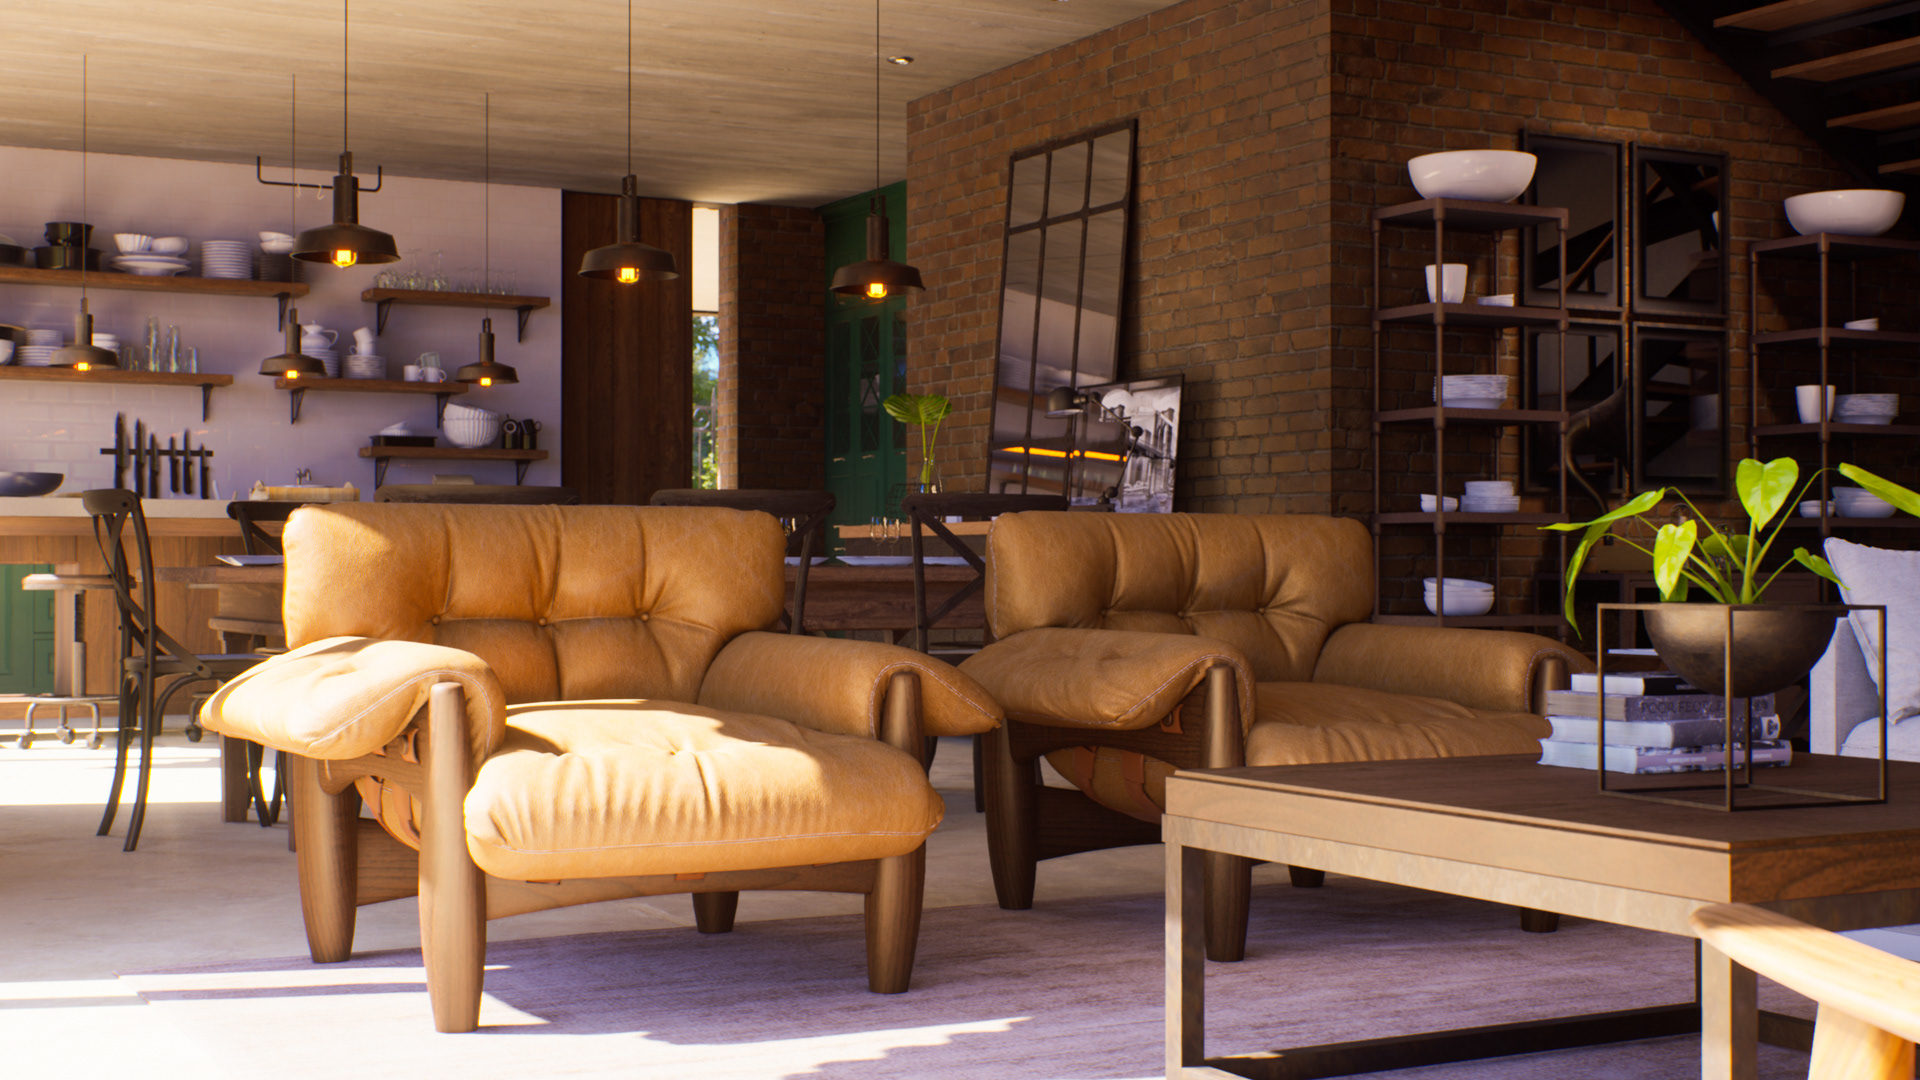
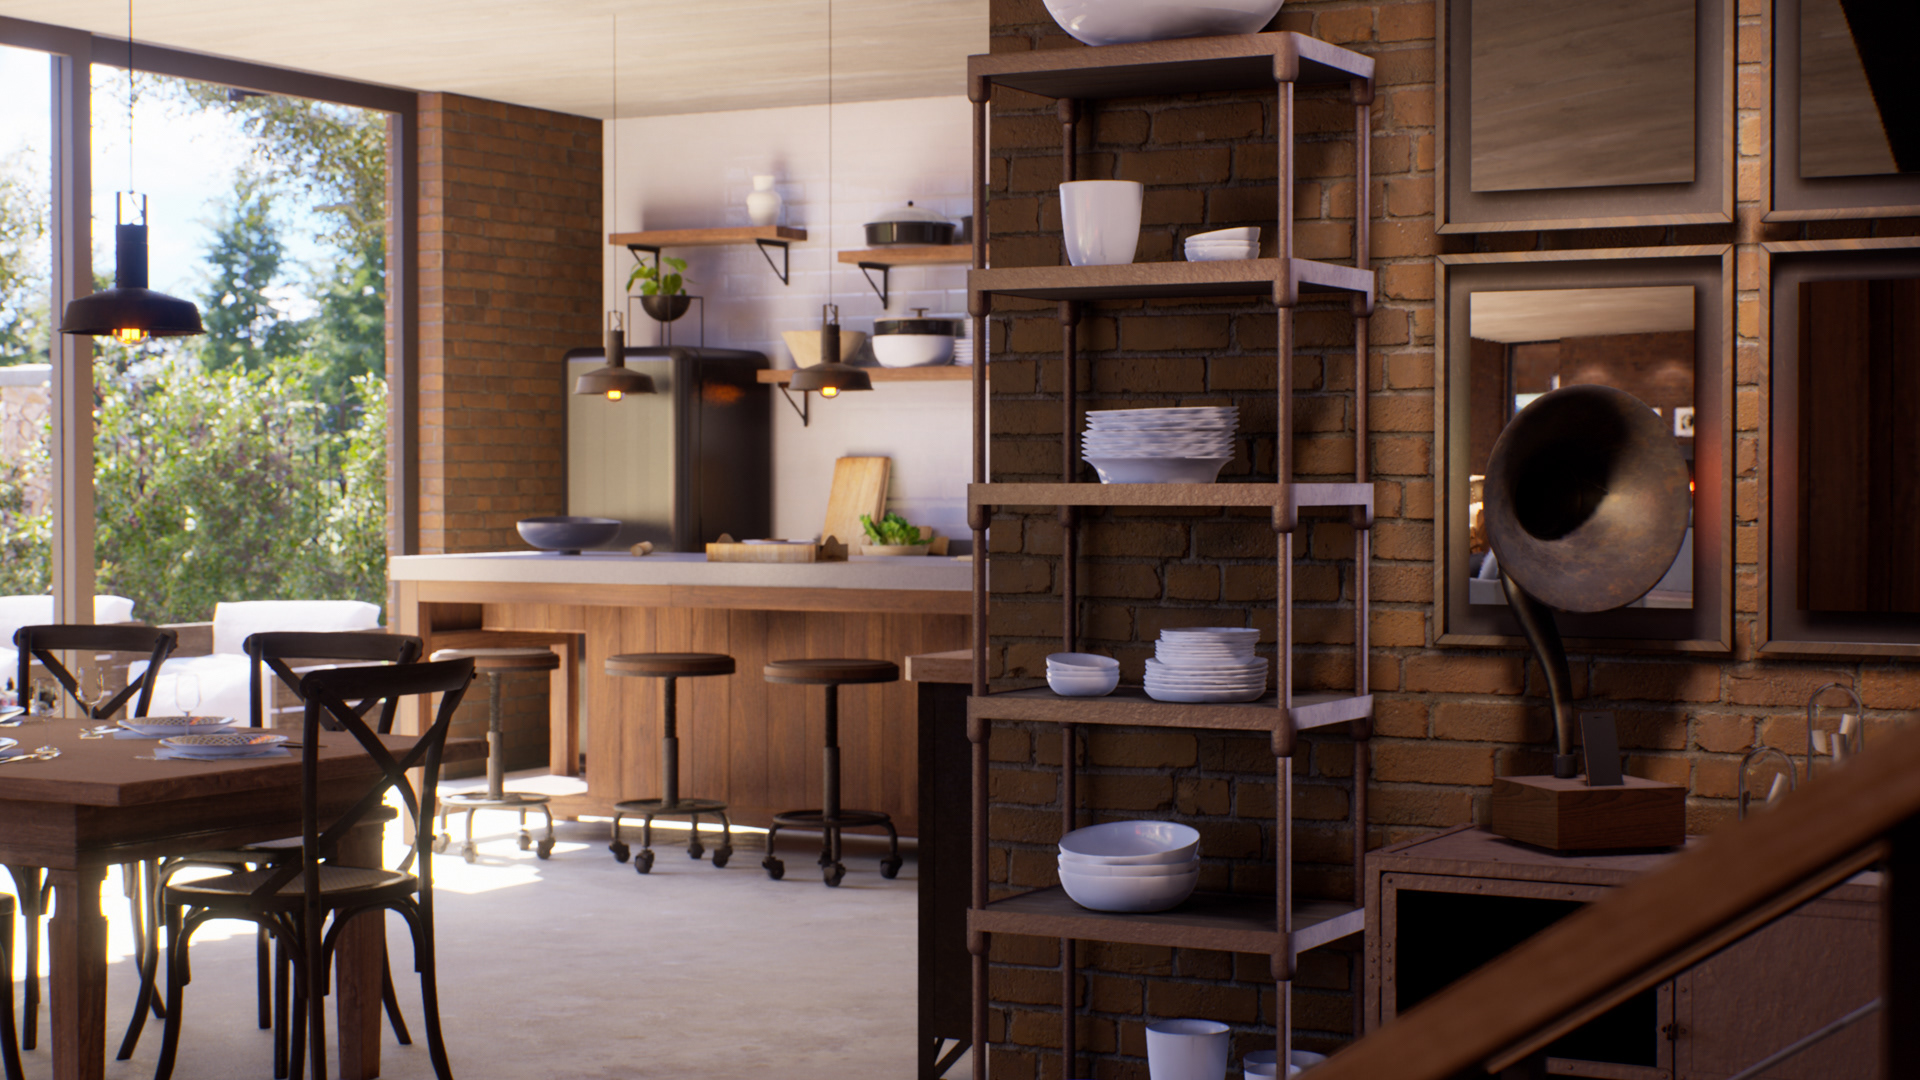
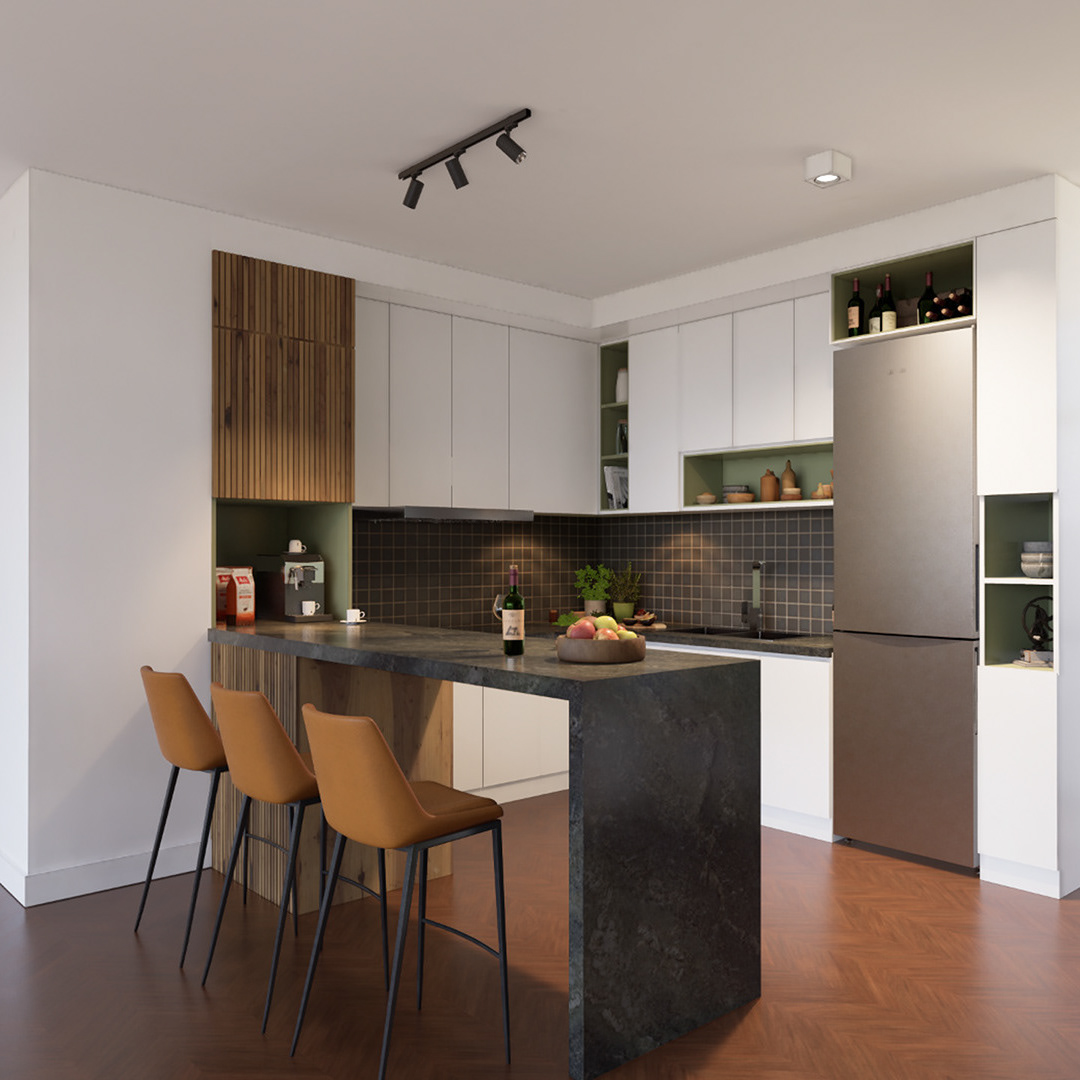
The models
The house was modeled from scratch in 3DS Max, using the AutoCAD floor plans provided by the client. Throughout the process, I ensured that the meshes were optimized for the Lightmass process, avoiding excessively large surfaces that would require high-resolution lightmaps.
As for the furniture, assets were sourced from online libraries like 3dsky, in accordance with the architect's preferences. Many of these assets required adjustments to incorporate unwrapped UV for lightmaps. Some of them also needed optimization, including polygon reduction, mesh merging for items with multiple components, and simplifying the number of materials to decrease draw calls.
As Unreal Engine 4 didn't have Nanite yet, It was important to create LODs for all the meshes to keep the project within the performance budget. I used Unreal Automatic LOD Generation tool for most of the furniture. The LODs of the foliage assets were created in SpeedTree modeler.
The post-process
In Architectural Visualization projects, achieving a neutral and photorealistic lighting setup is usually key. My process begins with a simplified configuration, with default parameters for both the Sun Light and Sky Light, while excluding dynamic exposure, vignette, chromatic aberration, bloom, and lens flares from the post-processing.
To simulate real-world lighting conditions, a spherical dome with an EXR sky texture is introduced. A reference photograph with similar lighting characteristics is selected, serving as a guide for adjusting the Sun Light intensity to match the reference's lighting balance. Once the lighting approximates the reference, fine-tuning the post-processing settings is initiated to impart the desired mood, if required.
In this project I used manual camera exposure to keep a better control. There are two Post Process Volumes in the scene, one for the interior and other for exterior with proper exposure settings for each condition.
The reflections are a combination of carefully positioned Reflections Capture actors and Screen Space Reflections. I also set up Planar Reflections for a few specific objects such as mirrors in the interior and the pool water.
The handheld videos
For this project I made an experiment with a VR headset trying to replicate a handheld camera type of footage. It was a nice way of rising engagement on social media due to the extra layer of realism that the movement adds to the render.
I created it with a HTC Vive headset by attaching a Cine Camera Actor to one of the motion controls of the First Person Char. With a SceneCaptureComponent2D and a cube mesh also attached to the same controller, I was able to project the camera view in the cube through its material, effectively emulating a smartphone in the virtual world so I could actually see what the camera was filming in VR.
With that setup I could play the game in VR and walk around with my "fake smartphone" while recording the Cine Camera Actor movement into a Sequence. That sequence could then be used to render a video after proper adjustments to the post process settings of the camera to better mimic a handheld footage with smaller dynamic range and snappier auto exposure adjustments.
The showcase videos
The other videos that can be checked in this page follow the basic formula. Several Level Sequences for different camera takes composed into a Master Sequence that were rendered as individual PNG frames. Those frames were then imported into Adobe Premiere Pro where the audio was added.
The interactive experience
For the real-time application, I set up a default First Person Character and placed blocking volumes in the level to let the player move around the house and its surroundings.
When the application starts, it kicks off a sequence to showcase the project. After the sequence ends, the player gets control to explore. The scene was optimized to run at around 30 frames per second on a computer with a GTX 1070 GPU. The video above shows a real-time capture of the application in action.
This project significantly influenced my career. It earned me first place in the NVIDIA Edge Program and a VR Dev Grant. It was also featured on various prominent websites, greatly enhancing my online presence and opening up numerous opportunities.
Credits:
Guilherme Rabello (rabellogp.com)